各位大佬,前文如下:
K8S搭建自动化部署环境(一)安装Kubernetes
K8S搭建自动化部署环境(二)安装K8S管理工具Kuboard V3
K8S搭建自动化部署环境(三)Jenkins下载、安装和启动
K8S搭建自动化部署环境(四)Jenkins多分支流水线Blue Ocean的安装和使用
本文正文:
首先,下载harbor包,比较大(V2.3.2有577M,如下图),请耐心下载。
https://github.com/goharbor/harbor/releases

1、需要解压harbor压缩包到:/usr/local目录下面。(其他目录也是可以的)
[root@nb1 local]# tar -zvxf harbor-offline-installer-v2.3.2.tgz
harbor/harbor.v2.3.2.tar.gz
harbor/prepare
harbor/LICENSE
harbor/install.sh
harbor/common.sh
harbor/harbor.yml.tmpl
[root@nb1 local]# cd harbor/
[root@nb1 harbor]# ll
总用量 594380
-rw-r--r-- 1 root root      3361 8月  18 16:51 common.sh
-rw-r--r-- 1 root root 608611132 8月  18 16:52 harbor.v2.3.2.tar.gz
-rw-r--r-- 1 root root      7840 8月  18 16:51 harbor.yml.tmpl
-rwxr-xr-x 1 root root      2500 8月  18 16:51 install.sh
-rw-r--r-- 1 root root     11347 8月  18 16:51 LICENSE
-rwxr-xr-x 1 root root      1881 8月  18 16:51 prepare
2、修改harbor配置文件harbor.yml。
先复制harbor.yml.tmpl为harbor.yml
- 其中的hostname需要改为本机的IP地址 192.168.1.127
hostname: 192.168.1.127
- https访问的化,需要提供密钥路径
certificate: /your/certificate/path
private_key: /your/private/key/path
【注意:】
- http配置和https配置二选一,另一种注释;
- http配置:
hostname: 192.168.1.127
http:
  port: 80
harbor_admin_password: harbor.2017
data_volume: /data/harbor/data
- https配置:
hostname: reg.dycoding.top
https:
  # https port for harbor, default is 443
  port: 8443
  # The path of cert and key files for nginx
  certificate: /data/harbor/reg/1_reg.dycoding.top_bundle.crt
  private_key: /data/harbor/reg/2_reg.dycoding.top.key
harbor_admin_password: harbor.2017
data_volume: /data/harbor/data
3、安装harbor服务
【注意:】下面的过程是基于http方式的,https方式类似。
执行如下命令:
sh /usr/local/harbor/install.sh
提示:需要事先安装 docker 和 docker-compose
Docker安装直通车(注意使用下面的最新安装方式):https://blog.csdn.net/wdy_2099/article/details/77367107
Docker-compose安装直通车: https://blog.csdn.net/wdy_2099/article/details/120042501
如果没有安装,则可能会提示以下信息:
[root@nb1 harbor]# sh install.sh

[Step 0]: checking if docker is installed ...
✖ Need to install docker(17.06.0+) first and run this script again.
或者提示:
[root@nb1 harbor]# sh install.sh

[Step 0]: checking if docker is installed ...

Note: docker version: 20.10.8

[Step 1]: checking docker-compose is installed ...
✖ Need to install docker-compose(1.18.0+) by yourself first and run this script again.
解决掉上述2个软件的问题后,重新执行 sh /usr/local/harbor/install.sh 命令
如果提示如下ERROR信息
Error happened in config validation...
ERROR:root:Error: The protocol is https but attribute ssl_cert is not set
只需要,将https的配置注释即可。CallBack,上述的注意点有说:http配置和https配置二选一,另一种注释;
# https related config
# https:
  # https port for harbor, default is 443
  # port: 443
  # The path of cert and key files for nginx
  # certificate: /your/certificate/path
  # private_key: /your/private/key/path
注释调https后,重新执行 sh /usr/local/harbor/install.sh 命令:
[root@nb1 harbor]# sh install.sh

[Step 0]: checking if docker is installed ...

Note: docker version: 20.10.8

[Step 1]: checking docker-compose is installed ...

Note: docker-compose version: 1.29.2

[Step 2]: loading Harbor images ...
Loaded image: goharbor/redis-photon:v2.3.2
Loaded image: goharbor/nginx-photon:v2.3.2
Loaded image: goharbor/harbor-portal:v2.3.2
Loaded image: goharbor/trivy-adapter-photon:v2.3.2
Loaded image: goharbor/chartmuseum-photon:v2.3.2
Loaded image: goharbor/notary-signer-photon:v2.3.2
Loaded image: goharbor/harbor-core:v2.3.2
Loaded image: goharbor/harbor-log:v2.3.2
Loaded image: goharbor/harbor-registryctl:v2.3.2
Loaded image: goharbor/harbor-exporter:v2.3.2
Loaded image: goharbor/notary-server-photon:v2.3.2
Loaded image: goharbor/prepare:v2.3.2
Loaded image: goharbor/harbor-db:v2.3.2
Loaded image: goharbor/harbor-jobservice:v2.3.2
Loaded image: goharbor/registry-photon:v2.3.2


[Step 3]: preparing environment ...

[Step 4]: preparing harbor configs ...
prepare base dir is set to /usr/local/harbor
WARNING:root:WARNING: HTTP protocol is insecure. Harbor will deprecate http protocol in the future. Please make sure to upgrade to https
Generated configuration file: /config/portal/nginx.conf
Generated configuration file: /config/log/logrotate.conf
Generated configuration file: /config/log/rsyslog_docker.conf
Generated configuration file: /config/nginx/nginx.conf
Generated configuration file: /config/core/env
Generated configuration file: /config/core/app.conf
Generated configuration file: /config/registry/config.yml
Generated configuration file: /config/registryctl/env
Generated configuration file: /config/registryctl/config.yml
Generated configuration file: /config/db/env
Generated configuration file: /config/jobservice/env
Generated configuration file: /config/jobservice/config.yml
Generated and saved secret to file: /data/secret/keys/secretkey
Successfully called func: create_root_cert
Generated configuration file: /compose_location/docker-compose.yml
Clean up the input dir


[Step 5]: starting Harbor ...
Creating network "harbor_harbor" with the default driver
Creating harbor-log ... done
Creating harbor-db     ... done
Creating harbor-portal ... done
Creating redis         ... done
Creating registry      ... done
Creating registryctl   ... done
Creating harbor-core   ... done
Creating harbor-jobservice ... done
Creating nginx             ... done
✔ ----Harbor has been installed and started successfully.----
上述,出现✔ ----Harbor has been installed and started successfully.----就表示安装Harbor成功了。
4、验证启动情况
可以通过 docker ps -a命令,或者,docker-compose ps命令进行查看。
[root@nb1 harbor]# docker ps -a
CONTAINER ID   IMAGE                                COMMAND                  CREATED              STATUS                        PORTS                                   NAMES
37555f540f9b   goharbor/nginx-photon:v2.3.2         "nginx -g 'daemon of…"   About a minute ago   Up About a minute (healthy)   0.0.0.0:80->8080/tcp, :::80->8080/tcp   nginx
a1279e837eb5   goharbor/harbor-jobservice:v2.3.2    "/harbor/entrypoint.…"   About a minute ago   Up About a minute (healthy)                                           harbor-jobservice
4aa506a7b793   goharbor/harbor-core:v2.3.2          "/harbor/entrypoint.…"   About a minute ago   Up About a minute (healthy)                                           harbor-core
089768d0fe69   goharbor/harbor-registryctl:v2.3.2   "/home/harbor/start.…"   About a minute ago   Up About a minute (healthy)                                           registryctl
42a11fa321d1   goharbor/registry-photon:v2.3.2      "/home/harbor/entryp…"   About a minute ago   Up About a minute (healthy)                                           registry
0761ec738a51   goharbor/redis-photon:v2.3.2         "redis-server /etc/r…"   About a minute ago   Up About a minute (healthy)                                           redis
81e787ab6c95   goharbor/harbor-portal:v2.3.2        "nginx -g 'daemon of…"   About a minute ago   Up About a minute (healthy)                                           harbor-portal
a131e3336753   goharbor/harbor-db:v2.3.2            "/docker-entrypoint.…"   About a minute ago   Up About a minute (healthy)                                           harbor-db
a339d4255f2a   goharbor/harbor-log:v2.3.2           "/bin/sh -c /usr/loc…"   About a minute ago   Up About a minute (healthy)   127.0.0.1:1514->10514/tcp               harbor-log

[root@nb1 harbor]# docker-compose ps
      Name                     Command                  State                      Ports
--------------------------------------------------------------------------------------------------------
harbor-core         /harbor/entrypoint.sh            Up (healthy)
harbor-db           /docker-entrypoint.sh 96 13      Up (healthy)
harbor-jobservice   /harbor/entrypoint.sh            Up (healthy)
harbor-log          /bin/sh -c /usr/local/bin/ ...   Up (healthy)   127.0.0.1:1514->10514/tcp
harbor-portal       nginx -g daemon off;             Up (healthy)
nginx               nginx -g daemon off;             Up (healthy)   0.0.0.0:80->8080/tcp,:::80->8080/tcp
redis               redis-server /etc/redis.conf     Up (healthy)
registry            /home/harbor/entrypoint.sh       Up (healthy)
registryctl         /home/harbor/start.sh            Up (healthy)
[root@nb1 harbor]#
5、登录Harbor WebUI
浏览器输入你的主机IP访问:http://192.168.1.127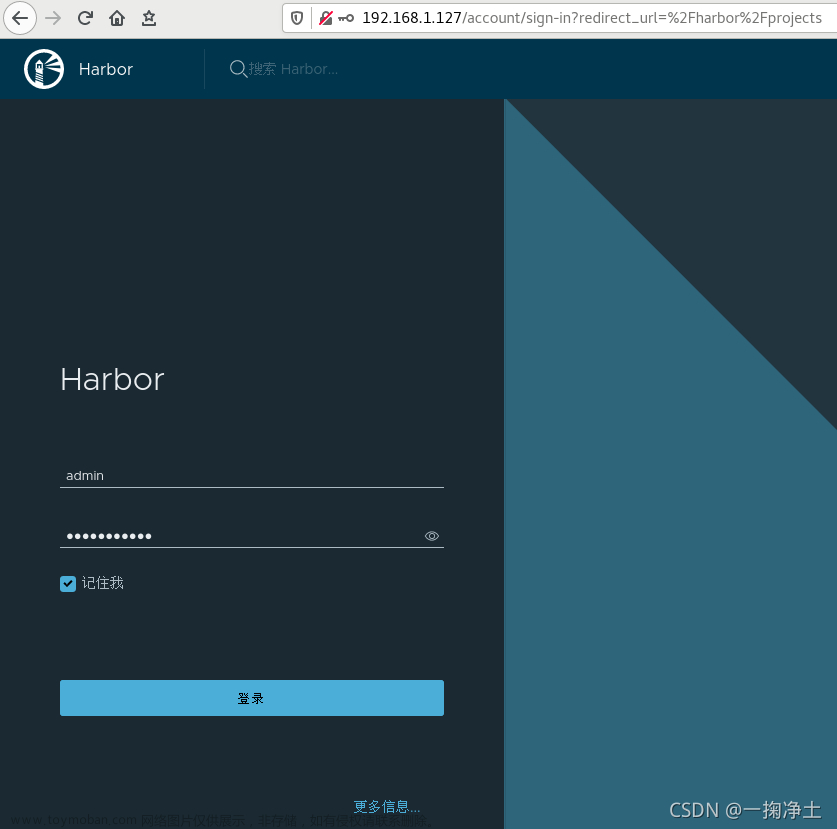
输入用户名admin和密码Harbor12345即可登录。
注意:密码是在harbor.yml中可以看到和修改的哈
# The initial password of Harbor admin
# It only works in first time to install harbor
# Remember Change the admin password from UI after launching Harbor.
harbor_admin_password: Harbor12345
登录后的效果如下:
问题1:我们在用docker登录harbor的时候,拒绝访问(connection refused):
[root@nb1 harbor]# docker login -u admin -p Harbor12345 http://192.168.1.127
WARNING! Using --password via the CLI is insecure. Use --password-stdin.
Error response from daemon: Get "https://192.168.1.127/v2/": dial tcp 192.168.1.127:443: connect: connection refused
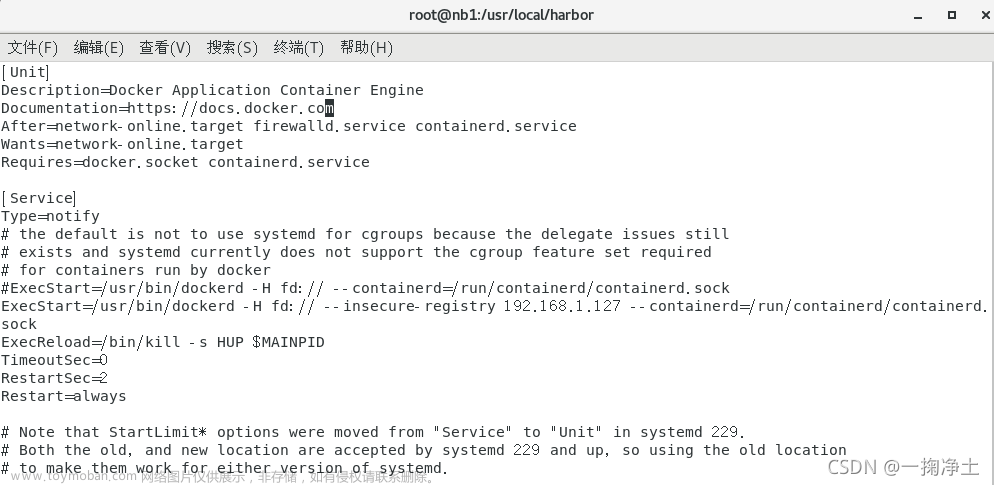
解决办法如下:
如下图,注释掉原来的ExecStart,将下面的代码加入即可。将注册IP设置为安装Harbor的主机IP
ExecStart=/usr/bin/dockerd -H fd:// --insecure-registry 192.168.1.127 --containerd=/run/containerd/containerd.sock
 修改完成后,需要重启docker服务
systemctl daemon-reload
systemctl restart docker
再次docker登录harbor:
[root@nb1 harbor]# docker login -u admin -p Harbor12345 http://192.168.1.127
WARNING! Using --password via the CLI is insecure. Use --password-stdin.
WARNING! Your password will be stored unencrypted in /root/.docker/config.json.
Configure a credential helper to remove this warning. See
https://docs.docker.com/engine/reference/commandline/login/#credentials-store

Login Succeeded
问题2:如果发现harbor没有启动,则需要在harbor目录(/usr/local/harbor:docker-compose.yml所在的目录)下执行如下命令:
[root@nb1 harbor]# docker-compose up -d
harbor-log is up-to-date
Starting harbor-portal ...
Starting harbor-portal ... done
Starting registry      ... done
Starting harbor-db     ... done
Starting redis         ... done
Starting harbor-core   ... done
Starting harbor-jobservice ...
Starting harbor-jobservice ... done
5、登录后,本地镜像打Tag, 然后推送到harbor服务器:
【以下命令执行,都需要先登录harbor:docker login -u admin -p Harbor12345 http://192.168.1.127】
docker tag nginx 192.168.1.127/test/nginx:test
docker push 192.168.1.127/test/nginx:test
详细过程为:
1、从官方镜像先拉去一个nginx镜像,作为示例:
[root@nb1 docker]# docker pull nginx
Using default tag: latest
latest: Pulling from library/nginx
e1acddbe380c: Pull complete
e21006f71c6f: Pull complete
f3341cc17e58: Pull complete
2a53fa598ee2: Pull complete
12455f71a9b5: Pull complete
b86f2ba62d17: Pull complete
Digest: sha256:4d4d96ac750af48c6a551d757c1cbfc071692309b491b70b2b8976e102dd3fef
Status: Downloaded newer image for nginx:latest
docker.io/library/nginx:latest

[root@nb1 docker]# docker images
REPOSITORY                      TAG       IMAGE ID       CREATED       SIZE
nginx                           latest    dd34e67e3371   2 weeks ago   133MB

# 2、打TAG
[root@nb1 docker]# docker tag nginx 192.168.1.127/test/nginx:test

# 3、Push到harbor仓库
[root@nb1 docker]# docker push 192.168.1.127/test/nginx:test
The push refers to repository [192.168.1.127/test/nginx]
fb04ab8effa8: Pushed
8f736d52032f: Pushed
009f1d338b57: Pushed
678bbd796838: Pushed
d1279c519351: Pushed
f68ef921efae: Pushed
test: digest: sha256:5e95e5eb8be4322e3b3652d737371705e56809ed8b307ad68ec59ddebaaf60e4 size: 1570
然后从Harbor的WebUI上就可以看到 nginx 已经存在了: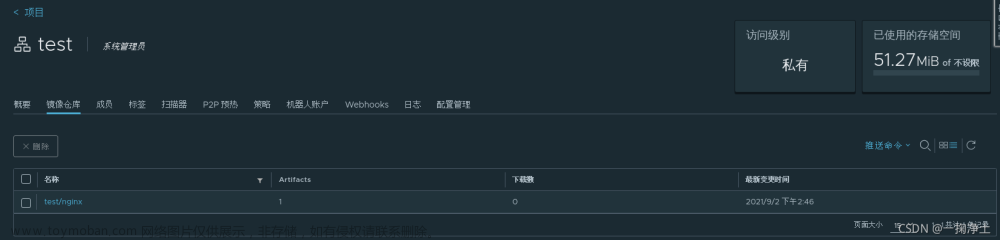 文章来源:https://www.toymoban.com/news/detail-452785.html
4、拉取镜像:文章来源地址https://www.toymoban.com/news/detail-452785.html
[root@nb001 harbor]# docker pull 192.168.1.127/test/nginx:test
93e71db: Pulling from test/nginx
bb7d5a84853b: Already exists
f02b617c6a8c: Already exists
d32e17419b7e: Already exists
c9d2d81226a4: Already exists
fab4960f9cd2: Already exists
510989d8108c: Already exists
c14538dbe225: Already exists
4a89eb6a8885: Pull complete
7bf621c94cdf: Pull complete
Digest: sha256:2d986246856d675930fb9bf1a0fa54ebac31359952713521447317855a278c1a
Status: Downloaded newer image for 192.168.1.127/test/nginx:test
192.168.1.127/test/nginx:test
修改配置文件后,重启harbor
# 先停止再启动:
docker-compose stop
docker-compose start

[root@nb001 harbor]# docker-compose stop
Stopping nginx             ... done
Stopping harbor-jobservice ... done
Stopping harbor-core       ... done
Stopping registry          ... done
Stopping registryctl       ... done
Stopping harbor-db         ... done
Stopping redis             ... done
Stopping harbor-portal     ... done
Stopping harbor-log        ... done
[root@nb001 harbor]# docker-compose start
Starting log         ... done
Starting registry    ... done
Starting registryctl ... done
Starting postgresql  ... done
Starting portal      ... done
Starting redis       ... done
Starting core        ... done
Starting jobservice  ... done
Starting proxy       ... done
[root@nb001 harbor]# docker-compose ps
      Name                     Command                       State                                                 Ports
---------------------------------------------------------------------------------------------------------------------------------------------------------------
harbor-core         /harbor/entrypoint.sh            Up (health: starting)
harbor-db           /docker-entrypoint.sh 96 13      Up (health: starting)
harbor-jobservice   /harbor/entrypoint.sh            Up (health: starting)
harbor-log          /bin/sh -c /usr/local/bin/ ...   Up (health: starting)   127.0.0.1:1514->10514/tcp
harbor-portal       nginx -g daemon off;             Up (health: starting)
nginx               nginx -g daemon off;             Up (health: starting)   0.0.0.0:8084->8080/tcp,:::8084->8080/tcp, 0.0.0.0:8443->8443/tcp,:::8443->8443/tcp
redis               redis-server /etc/redis.conf     Up (health: starting)
registry            /home/harbor/entrypoint.sh       Up (health: starting)
registryctl         /home/harbor/start.sh            Up (health: starting)
[root@nb001 harbor]#
END
到了这里,关于K8S搭建自动化部署环境(五)Harbor私有仓库的搭建全过程的文章就介绍完了。如果您还想了解更多内容,请在右上角搜索TOY模板网以前的文章或继续浏览下面的相关文章,希望大家以后多多支持TOY模板网!