普通项目与Maven项目差异
直接先上图,使用IDEA创建的普通JAVA项目结构如下:
可以看到普通java项目除了一个src及配置信息外,空空如也。通过IDEA工具创建Maven项目

创建的项目结构如下:

多了一个pom.xml文件,并且src文件夹中自动创建了main/java、main/resources等文件夹,方便管理。很明显使用maven来管理项目更加方便管理。同样各种开发环境都有各种的包管理工具,如PHP中会使用Composer,nodejs使用npm,android开发常用Gradle方式来进行包依赖管理。
如何在IDEA中转换普通项目
由于之前项目是普通项目,所以需要将其转换为Maven项目,在IDEA实现转换很简单,主要有以下方法:
添加Maven支持:
右键选项 “Add Framework Support”,如下:

然后设置maven相关信息:

最后编辑下pom.xml文件:
<?xml version="1.0" encoding="UTF-8"?>
<project xmlns="http://maven.apache.org/POM/4.0.0"
         xmlns:xsi="http://www.w3.org/2001/XMLSchema-instance"
         xsi:schemaLocation="http://maven.apache.org/POM/4.0.0 http://maven.apache.org/xsd/maven-4.0.0.xsd">
    <modelVersion>4.0.0</modelVersion>

    <groupId>jstudy.mybatis</groupId>
    <artifactId>java-mybatis-tiny</artifactId>
    <version>1.0-SNAPSHOT</version>

    <properties>
        <maven.compiler.source>14</maven.compiler.source>
        <maven.compiler.target>14</maven.compiler.target>
    </properties>

</project>
至此,转换完毕。
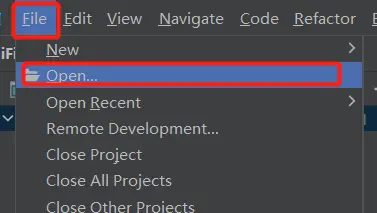
添加pom.xml文件转换
在项目根目录下添加pom.xml,并将上面内容粘贴,IDE工具将会自动识别maven项目,然后点击同步下项目:

转换完毕。
pom.xml文件说明
由于使用maven管理项目,顺便将pom.xml文件配置详解记录一下:文章来源:https://www.toymoban.com/news/detail-473377.html
<!-- project 根描述符 -->
<project xmlns="http://maven.apache.org/POM/4.0.0" xmlns:xsi="http://www.w3.org/2001/XMLSchema-instance" xsi:schemaLocation="http://maven.apache.org/POM/4.0.0
                      http://maven.apache.org/xsd/maven-4.0.0.xsd">
    <!-- 指定maven版本,一般为4.0.0 -->
    <modelVersion>4.0.0</modelVersion>


    <!-- 基本配置 -->
    <!-- 继承功能,可以指定父POM -->
    <parent>
        <groupId>org.springframework.boot</groupId>
        <artifactId>spring-boot-starter-parent</artifactId>
        <version>2.7.4</version>
        <!-- 指定父项目搜索路径,一般远程项目或者仓库无需配置 -->
        <relativePath /> <!-- lookup parent from repository -->
    </parent>
    <!-- 一般jar包为: groupId:artifactId:version -->
    <!-- 团体、组织标书符,项目的命名空间 -->
    <groupId>org.example</groupId>
    <!-- 项目唯一标识符,不能含有点号(.) -->
    <artifactId>learn-pom</artifactId>
    <!-- 版本号,可以实用特殊字符串 SNAPSHOT、LATEST、RELEASE -->
    <!-- SNAPSHOT: 用于开发过程中,表示不稳定版本 -->
    <!-- LATEST: 表示特定构建的最新发布版本 -->
    <!-- RELEASE: 最有一个稳定的发布版本 -->
    <version>1.0-SNAPSHOT</version>
    <!-- 项目打包类型,默认jar,常见类型:pom, jar, maven-plugin, ejb, war, ear, rar, par -->
    <packaging>jar</packaging>
    <!-- 项目依赖 -->
    <dependencies>
        <!-- 依赖节点 -->
        <dependency>
            <!-- 与方面解释一样 -->
            <groupId>io.springfox</groupId>
            <artifactId>springfox-boot-starter</artifactId>
            <version>3.0.0</version>
            <!-- 对应使用的打包类型,默认为jar -->
            <type>jar</type>
            <!-- 指任务的类路径及依赖关系传递性,包括 compile(默认)、provided、runtime、test、system -->
            <!-- compile: 默认范围,在所有classpath级依赖项目都可使用 -->
            <!-- provided: 编译和测试可用,但不可传递 -->
            <!-- runtime: 字面意,只在运行和测试时有效 -->
            <!-- test: 测试和执行阶段有效,不是传递的 -->
            <!-- system: 除特殊指定,始终可用,与systemPath结合使用 -->
            <scope>test</scope>
            <!-- scope为system时有效 -->
            <systemPath></systemPath>
            <!-- 可选项,无需此依赖运行 -->
            <optional>true</optional>
            <!-- 排除一个或多个元素 -->
            <exclusions>
                <exclusion>
                    <groupId>io.springfox</groupId>
                    <artifactId>springfox-boot-teseter</artifactId>
                </exclusion>
            </exclusions>
        </dependency>
    </dependencies>
    <!-- 多项目(子父项目)中方便依赖管理,保证版本一致,父项目中使用,声明依赖,但不引用,子项目中可以不加版本,使用父项目中配置 -->
    <dependencyManagement></dependencyManagement>
    <!-- 声明变量,如果后面用到可使用${变量名}来替代 -->
    <properties>
        <sf.version>2.0.0</sf.version>
    </properties>
    <!-- 多模块管理 -->
    <modules>
        <module>project-1</module>
        <module>project-2</module>
        <module>project-3</module>
    </modules>

    <!-- 构建设置 -->
    <!-- 包括project build、profile build -->
    <build>
        <!-- 执行目标 -->
        <defaultGoal>install</defaultGoal>
        <!-- 构建目标目录 -->
        <directory>${basedir}/target</directory>
        <!-- 各种默认路径及默认值 -->
        <sourceDirectory>${basedir}/src/main/java</sourceDirectory>
        <scriptSourceDirectory>${basedir}/src/main/scripts</scriptSourceDirectory>
        <outputDirectory>${basedir}/target/classes</outputDirectory>
        <testOutputDirectory>${basedir}/target/test-classes</testOutputDirectory>
        <testSourceDirectory>${basedir}/src/test/java</testSourceDirectory>
        <!-- 项目最终构建名称 -->
        <finalName>myproject-SNAPSHOT</finalName>
        <!-- 过滤资源信息 -->
        <filters>
            <filter>myproject.properties</filter>
        </filters>
        <!-- 扩展插件 -->
        <extensions>
            <extension>
                <groupId>mysql</groupId>
                <artifactId>mysql-connector-java</artifactId>
                <version>8.0.30</version>
            </extension>
        </extensions>
        <!-- 使用插件 -->
        <plugins>
            <plugin>
                <groupId>org.springframework.boot</groupId>
                <artifactId>spring-boot-maven-plugin</artifactId>
                <!-- 是否加载插件扩展名 -->
                <extensions>false</extensions>
                <!-- 是否可继承 -->
                <inherited>true</inherited>
                <!-- 插件本身需要的依赖 -->
                <dependencies></dependencies>
                <!-- 插件配置 -->
                <configuration>
                    <excludes>
                        <exclude>
                            <groupId>org.projectlombok</groupId>
                            <artifactId>lombok</artifactId>
                        </exclude>
                    </excludes>
                </configuration>
                <!-- 指定插件不同的目标 -->
                <executions>
                    <execution>
                        <!-- 目标标识 -->
                        <id>tester</id>
                        <!-- 目标列表 -->
                        <goals>
                            <goal>run</goal>
                        </goals>
                        <!-- 是否继承 -->
                        <inherited>false</inherited>
                        <!-- 特定配置 -->
                        <configuration></configuration>
                    </execution>
                </executions>
            </plugin>
        </plugins>
        <!-- 与dependencyManagement类似,为了统一版本 -->
        <pluginManagement></pluginManagement>
    </build>
    <!-- 针对site生成报告插件,与build内插件类似 -->
    <reporting>
        <plugins></plugins>
    </reporting>

    <!-- 项目信息,一般不用填写 -->
    <!-- 项目名称 -->
    <name>learn pom</name>
    <!-- 描述 -->
    <description>just learn pom project</description>
    <!-- 开始年份 -->
    <inceptionYear>2020</inceptionYear>
    <!-- 项目地址 -->
    <url>https://github.com/</url>
    <!-- 使用协议 -->
    <licenses>
        <license>
            <!-- 使用协议 -->
            <name>My License</name>
            <!-- 分发方式 -->
            <distribution>github</distribution>
            <!-- 协议地址 -->
            <url>https://github.com/</url>
            <!-- 注释 -->
            <comments>Just my License</comments>
        </license>
    </licenses>
    <!-- 组织信息 -->
    <organization>
        <!-- 组织名称 -->
        <name>My Cor</name>
        <!-- 组织链接 -->
        <url>https://github.com/</url>
    </organization>
    <!-- 开发者列表 -->
    <developers>
        <developer>
            <id>master</id>
            <name>hunkxia</name>
            <email>hunk.xia@gmail.com</email>
            <organization>My Cor</organization>
            <organizationUrl>https://github.com/</organizationUrl>
            <!-- 开发者角色列表 -->
            <roles>
                <role>master</role>
            </roles>
            <!-- 开发者其它信息 -->
            <properties></properties>
        </developer>
    </developers>
    <!-- 贡献者列表 -->
    <contributors></contributors>

    <!-- 环境设置 -->
    <!-- 缺陷提交讨论地址 -->
    <issueManagement>
        <!-- 缺陷跟踪系统 -->
        <system>iss</system>
        <url>https://github.com/</url>
    </issueManagement>
    <!-- 构建系统配置 -->
    <ciManagement>
        <!-- 构建系统类型 -->
        <system>cis</system>
        <!-- 构建地址 -->
        <url>https://github.com/</url>
        <!-- 通知人列表 -->
        <notifiers>
            <notifier>
                <type>mail</type>
                <sendOnError>true</sendOnError>
                <sendOnFailure>true</sendOnFailure>
                <sendOnSuccess>true</sendOnSuccess>
                <sendOnWarning>true</sendOnWarning>
                <address>hunk.xia@gmail.com</address>
                <!-- 通知配置 -->
                <configuration></configuration>
            </notifier>
        </notifiers>
    </ciManagement>
    <!-- 邮件列表 -->
    <mailingLists>
        <!-- 列表信息 -->
        <mailingList>
            <name>list-1</name>
            <subscribe></subscribe>
            <unsubscribe></unsubscribe>
            <post></post>
            <archive></archive>
            <otherArchives></otherArchives>
        </mailingList>
    </mailingLists>
    <!-- 源代码版本控制 -->
    <scm>
        <connection></connection>
        <developerConnection></developerConnection>
        <tag>HEAD</tag>
        <url></url>
    </scm>
    <!-- 预处理操作 -->
    <prerequisites></prerequisites>
    <!-- 仓库库配置,可以用来设置远程仓库 -->
    <repositories>
        <repository>
            <id>my repos</id>
            <name>My Repository</name>
            <url>http://repo.myrepos.cn/content/groups/public/</url>
            <releases>
                <enabled>true</enabled>
                <updatePolicy>daily</updatePolicy>
            </releases>
            <snapshots>
                <enabled>true</enabled>
                <checksumPolicy>warn</checksumPolicy>
            </snapshots>
            <layout>default</layout>
        </repository>
    </repositories>
    <!-- 插件仓库 -->
    <pluginRepositories></pluginRepositories>
    <!-- 发布管理,管理整个构建 -->
    <distributionManagement>
        <repository></repository>
        <site></site>
        <downloadUrl></downloadUrl>
        <status></status>
    </distributionManagement>
    <!-- 配置不同环境,不同包 -->
    <profiles>
        <profile>
            <id>release</id>
            <build>
                <resources>
                    <resource>
                        <directory>src/main/resources</directory>
                        <includes>
                            <include>**/*</include>
                        </includes>
                    </resource>
                </resources>
            </build>
        </profile>

        <profile>
            <id>test</id>
            <build>
                <resources>
                    <resource>
                        <directory>src/test/resources</directory>
                        <includes>
                            <include>config/*.properties</include>
                            <include>log4j.xml</include>
                        </includes>
                    </resource>
                    <resource>
                        <directory>src/main/resources</directory>
                        <includes>
                            <include>**/*.xml</include>
                        </includes>
                        <excludes>
                            <exclude>log4j.xml</exclude>
                        </excludes>
                    </resource>
                </resources>
            </build>
            <activation>
                <activeByDefault>true</activeByDefault>
            </activation>
        </profile>
    </profiles>
</project>
本篇完,下次再深入讲解和研究下多项目(父子项目、依赖项目)如何规范配置。文章来源地址https://www.toymoban.com/news/detail-473377.html
到了这里,关于如何使用IntelliJ IDEA将普通项目转换为Maven项目的文章就介绍完了。如果您还想了解更多内容,请在右上角搜索TOY模板网以前的文章或继续浏览下面的相关文章,希望大家以后多多支持TOY模板网!