前言
在日常开发中,到正式上线的时候大部分需要使用https来保证链路传输的安全性,这块相信大家都了解了,但有些特殊场景下可能需要http和https共存,并且端口都是同一个端口,只是协议不同,那这块我们就借助nginx来配置了。
nginx配置
nginx安装对应模块
- 通过configure安装共存需要的模块stream、with-stream_ssl_preread_module、http_ssl_module。如果自身nginx配置了其他模块,记得把原来的模块的内容添加进去。
./configure --with-stream --with-stream_ssl_preread_module --with-http_ssl_module
- 编译安装的模块,使用make命令,等待编译完成
make
- 编译完成后复制新的nginx文件替换到原来的nginx启动文件。记得先备份原来的nginx文件
mv /usr/local/nginx/sbin/nginx /usr/local/nginx/sbin/nginx.bak   //备份原有文件
cp -r /usr/local/nginx-1.22.0/objs/nginx /usr/local/nginx/sbin/   //复制新的nginx
// 到nginx的目录检验是否安装好
cd /usr/local/nginx/sbin/
./nginx -V
- 检查版本信息以及安装的模块是否正确,版本信息和模块都没问题的话就ok了。

配置文件修改
server模块分别配置http和https
- 添加http的server监听
    server {
		listen       8083;   ##监听端口
        server_name  localhost;

		location {
			proxy_pass   http://127.0.0.1:8001; ##应用服务地址,如tomcat对应地址
		}
    }
- 添加https的server监听
      #Https请求
    server {
        listen 8082 ssl; #使用不同的端口监听
        server_name localhost;

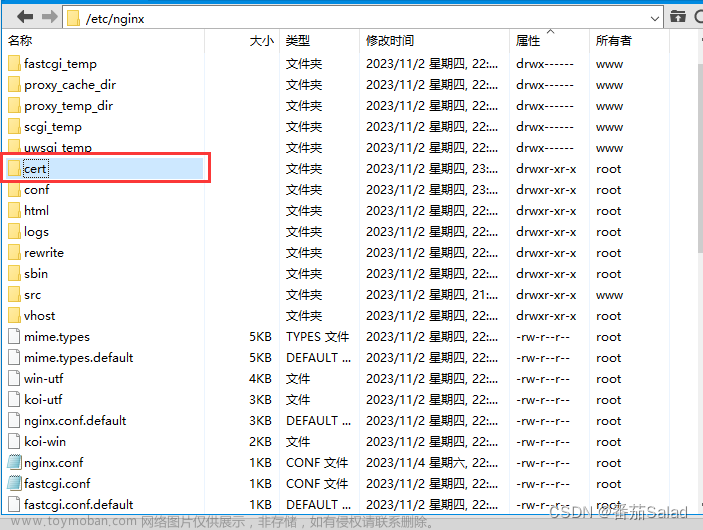
        ssl_certificate /usr/local/nginx/conf/cert/xxxx.pem; #证书放到 nginx的/conf/cert/文件夹内
        ssl_certificate_key /usr/local/nginx/conf/cert/xxxx.key; #证书放到 nginx的/conf/cert/文件夹内

        ssl_protocols TLSv1.2;
        ssl_ciphers ECDHE-RSA-AES256-SHA384:AES256-SHA256:RC4:HIGH:!MD5:!aNULL:!eNULL:!NULL:!DH:!EDH:!AESGCM;
        ssl_prefer_server_ciphers on;
        ssl_session_cache shared:SSL:10m;
        ssl_session_timeout 10m;

        location / {
	    	proxy_pass   http://127.0.0.1:8083;   #转发到http的请求中去
        }
     }
steam模块中的配置
- steam是与http模块统一个级别的,需要先添加steam模块的配置。
stream{

    log_format proxy '$remote_addr [$time_local] '
                 '$protocol $status $bytes_sent $bytes_received '
                 '$session_time "$upstream_addr" '
                 '"$upstream_bytes_sent" "$upstream_bytes_received" "$upstream_connect_time"';

      access_log /usr/local/nginx/logs/tcp_access.log proxy;
      error_log /usr/local/nginx/logs/tcp_error.log error;
      open_log_file_cache off;

}
- 在steam模块中分别配置http和https的监听
	server {
    	  listen 8084;#nginx侦听端口,统一对外端口,不能与下面已有的端口使用同一个
    	  ssl_preread on;
    	  proxy_pass $upstream;
        }

 	# 根据不同的协议走不同的upstream
       map $ssl_preread_protocol $upstream {
    	 default http_gateway;
   		"TLSv1.2" https_gateway;
    	"TLSv1.3" https_gateway;
       }
	#http请求
		upstream http_gateway {
   	    	server  127.0.0.1:8083;
        }
	#https请求
        upstream https_gateway {
            server  127.0.0.1:8082;
        }
完整配置文件
#user  nobody;
user root;
worker_processes  1;

#error_log  logs/error.log;
#error_log  logs/error.log  notice;
#error_log  logs/error.log  info;

#pid        logs/nginx.pid;


events {
    worker_connections  1024;
}


stream{

    log_format proxy '$remote_addr [$time_local] '
                 '$protocol $status $bytes_sent $bytes_received '
                 '$session_time "$upstream_addr" '
                 '"$upstream_bytes_sent" "$upstream_bytes_received" "$upstream_connect_time"';

      access_log /usr/local/nginx/logs/tcp_access.log proxy;
      error_log /usr/local/nginx/logs/tcp_error.log error;
      open_log_file_cache off;


	  # 根据不同的协议走不同的upstream
       map $ssl_preread_protocol $upstream {
    	 default http_gateway;
		"TLSv1.2" https_gateway;
    	"TLSv1.3" https_gateway;
       }

       server {
    	  listen 8084;#nginx侦听端口
    	  ssl_preread on;
    	  proxy_pass $upstream;
        }

		#http请求
		upstream http_gateway {
			server  127.0.0.1:8083;
        }
		#https请求
        upstream https_gateway {
            server  127.0.0.1:8082;
        }

}


http {
    include       mime.types;
    default_type  application/octet-stream;

    sendfile        on;
    #tcp_nopush     on;

    #keepalive_timeout  0;
    keepalive_timeout  65;

    #gzip  on;


    server {
		listen       8083;
        server_name  localhost;

		location {
			proxy_pass   http://127.0.0.1:8001; ##应用服务地址,如tomcat对应地址
		}

    }


   #Https请求
    server {
        listen 8082 ssl;
        server_name localhost;

        ssl_certificate /usr/local/nginx/conf/cert/xxxx.pem; #证书放到 nginx的/conf/cert/文件夹内
        ssl_certificate_key /usr/local/nginx/conf/cert/xxxx.key; #证书放到 nginx的/conf/cert/文件夹内

        ssl_protocols TLSv1.2;
        ssl_ciphers ECDHE-RSA-AES256-SHA384:AES256-SHA256:RC4:HIGH:!MD5:!aNULL:!eNULL:!NULL:!DH:!EDH:!AESGCM;
        ssl_prefer_server_ciphers on;
        ssl_session_cache shared:SSL:10m;
        ssl_session_timeout 10m;

        location / {
	    proxy_pass   http://127.0.0.1:8083;
        }
     }

}
重启nginx并测试
- 测试nginx配置文件是否有问题。
//到对应目录,检验配置文件是否有错误
./nginx - t
 文章来源:https://www.toymoban.com/news/detail-690300.html
- 没有相关错误即可重启nginx
./nginx - s reload
- reload命令在安装了模块后有可能不生效,可以使用kill的方式停止nginx后重新启动
ps -ef|grep nginx   ##查看nginx对应的进程
kill -TERM pid   ##kill掉查看出来的进程id
./nginx -c /usr/local/nginx/conf/nginx.conf   ##指定配置文件重新启动
- 使用对应的地址进行测试。按上面配置则可以访问
http://ip:8084/
https://ip:8084/
两个地址都能访问则代表配置成功。
总结
以上呢就是http和https共存的基本配置了,大家可以尽情发挥了,可以跟着这块去延续其他的各种配置,比如请求http的时候默认跳转到https等等。文章来源地址https://www.toymoban.com/news/detail-690300.html
到了这里,关于nginx实现https与http共存方案的文章就介绍完了。如果您还想了解更多内容,请在右上角搜索TOY模板网以前的文章或继续浏览下面的相关文章,希望大家以后多多支持TOY模板网!


