- vue2
- element-ui
- axios
含接口调用示例
1.创建vue2项目
开发工具为HBuilderX 3.7.3
1.1.新建项目

1.2.普通项目-vue项目(2.6.10)

等待创建项目

2.安装element-ui组件
2.1右键左下角开始图标

2.2.cd进入项目目录,执行安装element-ui
npm i element-ui -S
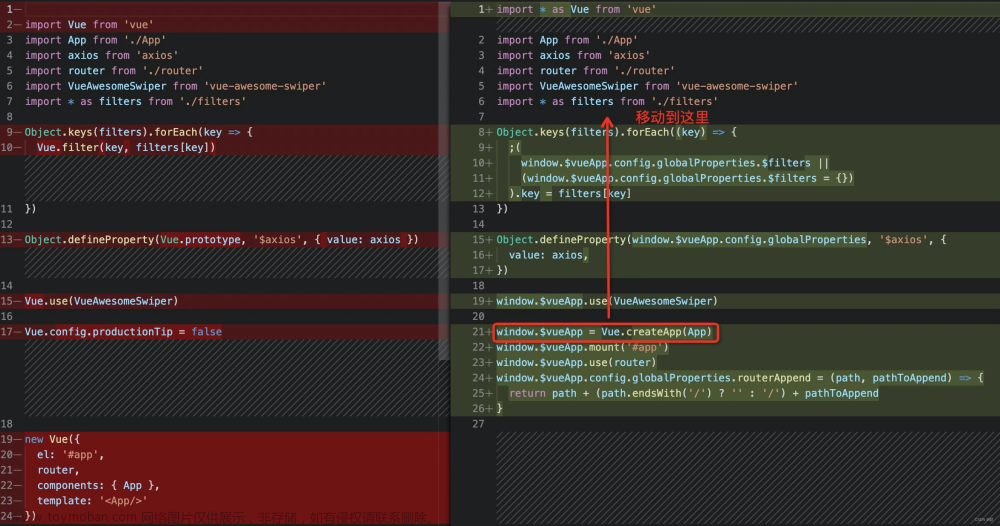
2.3.main.js引入配置
import {
  Pagination,
  Dialog,
  Autocomplete,
  Dropdown,
  DropdownMenu,
  DropdownItem,
  Menu,
  Submenu,
  MenuItem,
  MenuItemGroup,
  Input,
  InputNumber,
  Radio,
  RadioGroup,
  RadioButton,
  Checkbox,
  CheckboxButton,
  CheckboxGroup,
  Switch,
  Select,
  Option,
  OptionGroup,
  Button,
  ButtonGroup,
  Table,
  TableColumn,
  DatePicker,
  TimeSelect,
  TimePicker,
  Popover,
  Tooltip,
  Breadcrumb,
  BreadcrumbItem,
  Form,
  FormItem,
  Tabs,
  TabPane,
  Tag,
  Tree,
  Alert,
  Slider,
  Icon,
  Row,
  Col,
  Upload,
  Progress,
  Spinner,
  Badge,
  Card,
  Rate,
  Steps,
  Step,
  Carousel,
  CarouselItem,
  Collapse,
  CollapseItem,
  Cascader,
  ColorPicker,
  Transfer,
  Container,
  Header,
  Aside,
  Main,
  Footer,
  Timeline,
  TimelineItem,
  Link,
  Divider,
  Image,
  Calendar,
  Backtop,
  PageHeader,
  CascaderPanel,
  Loading,
  MessageBox,
  Message,
  Notification
} from 'element-ui';

Vue.use(Pagination);
Vue.use(Dialog);
Vue.use(Autocomplete);
Vue.use(Dropdown);
Vue.use(DropdownMenu);
Vue.use(DropdownItem);
Vue.use(Menu);
Vue.use(Submenu);
Vue.use(MenuItem);
Vue.use(MenuItemGroup);
Vue.use(Input);
Vue.use(InputNumber);
Vue.use(Radio);
Vue.use(RadioGroup);
Vue.use(RadioButton);
Vue.use(Checkbox);
Vue.use(CheckboxButton);
Vue.use(CheckboxGroup);
Vue.use(Switch);
Vue.use(Select);
Vue.use(Option);
Vue.use(OptionGroup);
Vue.use(Button);
Vue.use(ButtonGroup);
Vue.use(Table);
Vue.use(TableColumn);
Vue.use(DatePicker);
Vue.use(TimeSelect);
Vue.use(TimePicker);
Vue.use(Popover);
Vue.use(Tooltip);
Vue.use(Breadcrumb);
Vue.use(BreadcrumbItem);
Vue.use(Form);
Vue.use(FormItem);
Vue.use(Tabs);
Vue.use(TabPane);
Vue.use(Tag);
Vue.use(Tree);
Vue.use(Alert);
Vue.use(Slider);
Vue.use(Icon);
Vue.use(Row);
Vue.use(Col);
Vue.use(Upload);
Vue.use(Progress);
Vue.use(Spinner);
Vue.use(Badge);
Vue.use(Card);
Vue.use(Rate);
Vue.use(Steps);
Vue.use(Step);
Vue.use(Carousel);
Vue.use(CarouselItem);
Vue.use(Collapse);
Vue.use(CollapseItem);
Vue.use(Cascader);
Vue.use(ColorPicker);
Vue.use(Transfer);
Vue.use(Container);
Vue.use(Header);
Vue.use(Aside);
Vue.use(Main);
Vue.use(Footer);
Vue.use(Timeline);
Vue.use(TimelineItem);
Vue.use(Link);
Vue.use(Divider);
Vue.use(Image);
Vue.use(Calendar);
Vue.use(Backtop);
Vue.use(PageHeader);
Vue.use(CascaderPanel);

Vue.use(Loading.directive);


import axios from 'axios';

Vue.prototype.$loading = Loading.service;
Vue.prototype.$msgbox = MessageBox;
Vue.prototype.$alert = MessageBox.alert;
Vue.prototype.$confirm = MessageBox.confirm;
Vue.prototype.$prompt = MessageBox.prompt;
Vue.prototype.$notify = Notification;
Vue.prototype.$message = Message;
import 'element-ui/lib/theme-chalk/index.css';
3.安装axios
3.1.npm安装axios
npm install --save axios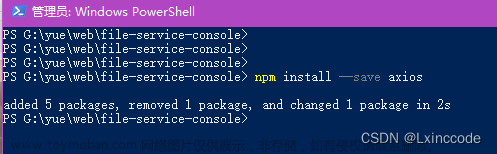
3.2.项目根目录创建[vue.config.js]文件, 内容如下
'use strict'
const path = require('path')

function resolve(dir) {
  return path.join(__dirname, dir)
}

const port = process.env.port || process.env.npm_config_port || 9527 // dev port
const name =  '测试' // page title

// All configuration item explanations can be find in https://cli.vuejs.org/config/
module.exports = {
  /**
   * You will need to set publicPath if you plan to deploy your site under a sub path,
   * for example GitHub Pages. If you plan to deploy your site to https://foo.github.io/bar/,
   * then publicPath should be set to "/bar/".
   * In most cases please use '/' !!!
   * Detail: https://cli.vuejs.org/config/#publicpath
   */
  publicPath: '/',
  outputDir: 'dist',
  assetsDir: 'static',
  lintOnSave: process.env.NODE_ENV === 'development',
  productionSourceMap: false,
  devServer: {
    port: port,
    open: true,
    overlay: {
      warnings: false,
      errors: true
    },
    proxy: {
      // 代理test开头的uri
      '/test': {
        target: 'http://127.0.0.1:33001', // 后端地址
        // target: 'localhost:8080/manage', // 原始地址
        changeOrigin: true, // 开启代理,在本地创建一个虚拟服务端
        pathRewrite: {
          '^/test': 'test'
        }
      }
    }
    //before: require('./mock/mock-server.js')
  },
  configureWebpack: {
    // provide the app's title in webpack's name field, so that
    // it can be accessed in index.html to inject the correct title.
    name: name,
    resolve: {
      alias: {
        '@': resolve('src')
      }
    }
  },
  chainWebpack(config) {
    // it can improve the speed of the first screen, it is recommended to turn on preload
    // it can improve the speed of the first screen, it is recommended to turn on preload
    config.plugin('preload').tap(() => [
      {
        rel: 'preload',
        // to ignore runtime.js
        // https://github.com/vuejs/vue-cli/blob/dev/packages/@vue/cli-service/lib/config/app.js#L171
        fileBlacklist: [/\.map$/, /hot-update\.js$/, /runtime\..*\.js$/],
        include: 'initial'
      }
    ])

    // when there are many pages, it will cause too many meaningless requests
    config.plugins.delete('prefetch')

    // set svg-sprite-loader
    config.module
      .rule('svg')
      .exclude.add(resolve('src/icons'))
      .end()
    config.module
      .rule('icons')
      .test(/\.svg$/)
      .include.add(resolve('src/icons'))
      .end()
      .use('svg-sprite-loader')
      .loader('svg-sprite-loader')
      .options({
        symbolId: 'icon-[name]'
      })
      .end()
  }
}
代理后端配置如下, 三个test改成相同的uri前缀即可, uri该签注会代理到后端
proxy: {
// 代理test开头的uri
'/test': {
target: 'http://192.168.1.1:8080', // 后端地址
changeOrigin: true, // 开启代理,在本地创建一个虚拟服务端
pathRewrite: {
'^/test': '/test'
}
}
}
3.3.src下创建util目录, util文件夹下创建request.js, 内容如下
const res = response.data
这个需要根据后端接口格式修改
/*引入axios*/
import axios from 'axios'
import {
	MessageBox,
	Message
} from 'element-ui'

const request = axios.create({
	baseURL: '', // 基础路径,将统一的部分全部封装
	withCredentials: true // 表示请求可以携带cookie
})

axios.defaults.headers['Content-Type'] = 'application/x-www-form-urlencoded'


// response interceptor
request.interceptors.response.use(
	/**
	 * If you want to get http information such as headers or status
	 * Please return  response => response
	 */

	/**
	 * Determine the request status by custom code
	 * Here is just an example
	 * You can also judge the status by HTTP Status Code
	 */
	response => {
		const res = response.data
		// if the custom code is not 20000, it is judged as an error.
		if (res.errCode !== 0) {
			Message({
				message: res.errMessage || 'Error',
				type: 'error',
				duration: 3 * 1000
			})
			// return Promise.reject(new Error(res.message || 'Error'))
			return null
		} else {
			return res
		}
	},
	error => {
		console.log('err' + error) // for debug
		Message({
			message: error.message,
			type: 'error',
			duration: 5 * 1000
		})
		return Promise.reject(error)
	}
)


//前端采用export.default,在写后端代码时用module.export
export default request
4.创建测试调用http
4.1.src下创建api目录, api下创建test.js, 内容如下
import request from '@/util/request'


export function test() {
  return request({
    url: '/test/2',
    method: 'get'
  })
}
4.2. App.vue替换
<template>
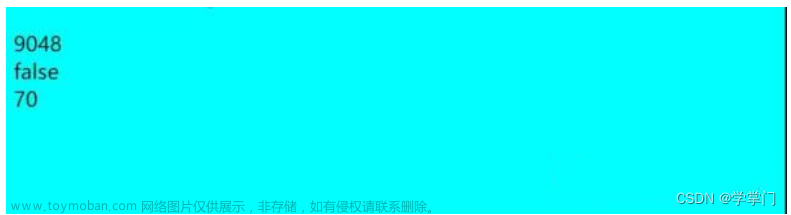
<div>
{{ testData }}
</div>
</template>
<script>
import {
test,
} from '@/api/test'
export default {
name: 'app',
data() {
return {
testData: null
}
},
created() {
this.t1()
},
methods: {
t1() {
test().then(response => {
console.log(response)
this.testData = response.msg
})
}
}
}
</script>
<style>
</style>4.3.后台接口需要返回以下内容
接口地址为 : http://127.0.0.1:33001/test/2
    @GetMapping("/test/2")
    public Object test2() {
        Map<String, Object> res = new HashMap<>();
        res.put("code", 200);
        res.put("errCode", 0);
        res.put("errMessage", "测试错误");
        res.put("msg", "SUCCESS");
        return res;
    }
内容如下
{
"msg": "SUCCESS",
"code": 200,
"errCode": 0,
"errMessage": "测试错误"
}
5.启动
npm run serve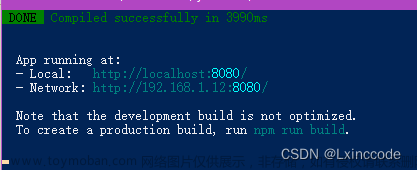
6.编译
npm run build7.部署
dist里面的文件放到nginx目录下
nginx.conf添加以下配置文章来源:https://www.toymoban.com/news/detail-738857.html
		location /test {
            proxy_pass http://127.0.0.1:33001;
            proxy_set_header   X-Forwarded-Proto $scheme;
            proxy_set_header   Host              $http_host;
            proxy_set_header   X-Real-IP         $remote_addr;
        }
可以参考 :VUE(5) : vue-element-admin[5] : 打包及nginx部署_使用nginx部署vue-element-admin项目-CSDN博客文章来源地址https://www.toymoban.com/news/detail-738857.html
到了这里,关于vue(32) : win10创建vue2基础前端框架的文章就介绍完了。如果您还想了解更多内容,请在右上角搜索TOY模板网以前的文章或继续浏览下面的相关文章,希望大家以后多多支持TOY模板网!