前言
Untiy中设计UI不会使用GUI,因为它必须要运行代码才可以看出UI的布局结果,而且GUI不支持屏幕分辨率自适应,所以一般会使用UGUI等设计,但是为了搞清楚高级UI的原理,通过GUI去设计一个类似于UGUI的工具是个很好的学习方法。所以本文属于是脱裤子放屁,但是只有脱下裤子把屁放出来才能研究屁的物质组成。
九宫格布局概念
来看这样一张图

把屏幕分成九个部分,将每个部分看作是一个单独的坐标系,然后每个部分的原点如图中的红点所示
然后再将每个控件也分成九宫格,如下图所示

我们可以选择不同的部分作为按钮的“中心点”
再有就是偏移位置,这是我们自行设置的。举个例子,看下图
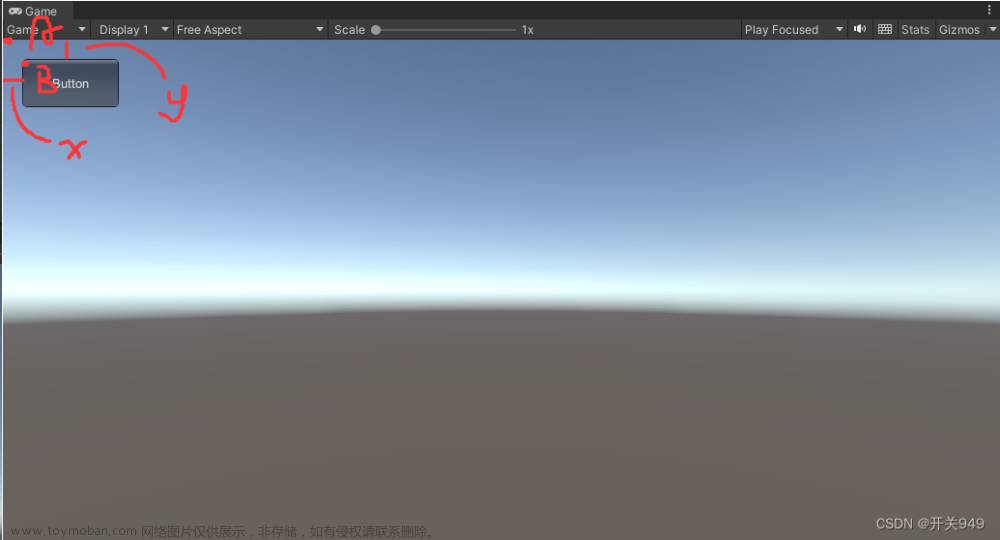
图1
在这幅图中,选取了屏幕的左上部分作为按钮确认位置的原点,按钮的中心点设置为了按钮的左上角,x和y分别是按钮距离原点的偏移位置(人为设置),最终根据一个公式得出按钮的左上角的坐标为A点的坐标加上中心点偏移位置再加上人为设置的偏移位置就可以得出按钮的左上角的坐标,然后绘制出整个按钮。
所以这个位置的公式
控件坐标位置 = 相对屏幕位置 + 中心点偏移位置 + 偏移位置
不太好理解,但是保留这个疑问,先来写代码,一边写一边体会。
基类
位置类
首先要去计算每个空间在屏幕上的位置,具体的原理是根据上面的公式。
using System.Collections;
using System.Collections.Generic;
using UnityEngine;

//这个枚举用来表示对齐方式 一共九种
public enum E_Aligment_Type
{
    Up,
    Down,
    Left,
    Right,
    Center,
    Left_Up,
    Left_Down,
    Right_Up,
    Right_Down,
}

[System.Serializable]
public class CustomGUIPOS
{
    //这个变量会返回给外部  用来绘制一个控件
    private Rect rPos = new Rect(0, 0, 100, 100);
    //这个是屏幕对齐方式
    public E_Aligment_Type screen_Alignment_Type = E_Aligment_Type.Center;
    //这个是控件的对齐方式
    public E_Aligment_Type controller_Alignment_Type = E_Aligment_Type.Center;
    //这个是手动在外部设置的偏移位置
    public Vector2 pos;
    //这个表示控件的宽和高
    public float width = 100f;
    public float height = 50f;
    //这个是控件用来计算位置的中心位置
    private Vector2 centerPos;
    //此函数用来计算控件中心点的偏移,可以参考之前的图
    private void CalcCenterPos()
    {
        switch (controller_Alignment_Type)
        {
            case E_Aligment_Type.Up:
                centerPos.x = -width / 2;
                centerPos.y = 0;
                break;
            case E_Aligment_Type.Down:
                centerPos.x = -width / 2;
                centerPos.y = -height;
                break;
            case E_Aligment_Type.Left:
                centerPos.x = 0;
                centerPos.y = -height / 2;
                break;
            case E_Aligment_Type.Right:
                centerPos.x = -width;
                centerPos.y = -height / 2;
                break;
            case E_Aligment_Type.Center:
                centerPos.x = -width / 2;
                centerPos.y = -height / 2;
                break;
            case E_Aligment_Type.Left_Up:
                centerPos.x = 0;
                centerPos.y = 0;
                break;
            case E_Aligment_Type.Left_Down:
                centerPos.x = 0;
                centerPos.y = -height;
                break;
            case E_Aligment_Type.Right_Up:
                centerPos.x = -width;
                centerPos.y = 0;
                break;
            case E_Aligment_Type.Right_Down:
                centerPos.x = -width;
                centerPos.y = -height;
                break;
        }
    }
    //这个函数用来计算空间中心点的坐标
    private void CalcPos()
    {
        switch (screen_Alignment_Type)
        {
            case E_Aligment_Type.Up:
                rPos.x = Screen.width / 2 + centerPos.x + pos.x;
                rPos.y = centerPos.y + pos.y;
                break;
            case E_Aligment_Type.Down:
                rPos.x = Screen.width / 2 + centerPos.x + pos.x;
                //为什么减去pos.y  是因为要方便输入
                rPos.y = Screen.height + centerPos.y - pos.y;
                break;
            case E_Aligment_Type.Left:
                rPos.x = centerPos.x + pos.x;
                rPos.y = Screen.height / 2 + centerPos.y + pos.y;
                break;
            case E_Aligment_Type.Right:
                rPos.x = Screen.width + centerPos.x - pos.x;
                rPos.y = Screen.height / 2 + centerPos.y + pos.y;
                break;
            case E_Aligment_Type.Center:
                rPos.x = Screen.width / 2 + centerPos.x + pos.x;
                rPos.y = Screen.height / 2 + centerPos.y + pos.y;
                break;
            case E_Aligment_Type.Left_Up:
                rPos.x = centerPos.x + pos.x;
                rPos.y = centerPos.y + pos.y;
                break;
            case E_Aligment_Type.Left_Down:
                rPos.x = centerPos.x + pos.x;
                rPos.y = Screen.height + centerPos.y - pos.y;
                break;
            case E_Aligment_Type.Right_Up:
                rPos.x = Screen.width + centerPos.x - pos.x;
                rPos.y = centerPos.y + pos.y;
                break;
            case E_Aligment_Type.Right_Down:
                rPos.x = Screen.width + centerPos.x - pos.x;
                rPos.y = Screen.height + centerPos.y - pos.y;
                break;
        }
    }
    //这个属性用来得到控件最终的位置以及宽和高
    public Rect Pos
    {
        get
        {
            CalcCenterPos();
            CalcPos();
            rPos.width = width;
            rPos.height = height;
            return rPos;
        }
    }
}
这就是整个计算控件位置宽高的类。
注意为什么有的地方是减去pos.x,这是为了方便输入,其实加上也是可以的,只是到时候在编辑界面输入可能会有点别扭,这么做是为了保持坐标轴和屏幕坐标轴保持一致。
以图1为例,此时屏幕九宫格和控件中心的对齐方式都为Left_Up,偏移量人为设置成(10,10),根据两个函数的计算,rPos最终等于(10,10,100,50),然后在GUI函数中去绘制这个Button控件。
此外,还要加上特性[System.Serializable]才能在编辑界面改变
控件基类
所有的控件都有很多共同特征,所以完全可以写一个抽象类来抽象出它们的共同特征,并让特定的控件继承此抽象类。代码如下
using System.Collections;
using System.Collections.Generic;
using UnityEngine;

public enum E_Style_OnOff
{
    On,
    Off,
}

public abstract class CustomController : MonoBehaviour
{
    //提取控件的共同信息
    //位置信息
    public CustomGUIPos guiPos;

    //显示内容信息
    public GUIContent content;

    //自定义样式
    public GUIStyle style;

    //自定义样式是否启用的开关  默认关闭
    public E_Style_OnOff styleOnOrOff = E_Style_OnOff.Off;

    public void DrawGUI()
    {
        switch (styleOnOrOff)
        {
            case E_Style_OnOff.On:
                StyleOnDraw();
                break;
            case E_Style_OnOff.Off:
                StyleOffDraw();
                break;
        }
    }

    /// <summary>
    /// 自定义样式开始时的绘制方法
    /// </summary>
    protected abstract void StyleOnDraw();


    /// <summary>
    /// 自定义样式关闭时的绘制方法
    /// </summary>
    protected abstract void StyleOffDraw();

}
这个类的主要作用就是提取控件的共同特征,此外代码中还写了两个抽象函数,因为使用GUI绘制控件可以分成两类,比如GUI.Button(guiPos.Pos, content)和GUI.Button(guiPos.Pos, content,style),绘制这两个按钮时一个使用了自定义样式,一个不支持,所以我们可以抽象出两个函数,并且利用枚举E_Style_OnOff来让用户在自定义界面选择是否自定义控件的样式,使用该枚举定义出一个编辑界面可以更改的字段styleOnOrOff ,当选择On时,表示的就是自定义样式,这样我们只用在控件子类中重写这两个抽象函数即可。
画布类(根类)
使用UGUI时,系统会自动创建一张画布出来,所有的控件都会绘制在这张画布上,所以需要有一个画布类。
using System.Collections;
using System.Collections.Generic;
using UnityEngine;

[ExecuteAlways]
public class CustomGUIRoot : MonoBehaviour
{
    private CustomController[] customControllers;

    private void Start()
    {
        customControllers = this.GetComponentsInChildren<CustomController>();
    }

    //在这统一绘制子对象控件   这相当于一张画布

    private void OnGUI()
    {
        //每一次绘制之前  得到所有子对象空间的父类脚本
        //这一句代码会浪费性能  因为OnGUI函数总是不停的执行  这里不停的去获取有点浪费性能
            customControllers = this.GetComponentsInChildren<CustomController>();

        //遍历每一个控件 让其执行绘制
        for (int i = 0; i < customControllers.Length; i++)
        {
             customControllers[i].DrawGUI();
        }
    }
}
因为所有的控件都绘制在画布上,这一段代码主要利用GetComponentsInChildren函数去获取画布的子物体上的CustomController脚本,然后调用里面的DrawGUI函数。
其中还有一个浪费性能的问题,这里暂时不解决。
此外,为了让我们不在游戏运行状态下就可以看到布局情况,这里使用了一个特性[ExecuteAlways],这个特性不应该被乱用。
最后,我们需要在start函数中获取一次用来初始化,否则报空引用的错误,这里是我刚做的时候犯得错误,留意一下。
控件子类
下面就可以来写控件子类了,只需要继承CustomController类即可。
标签Label
using System.Collections;
using System.Collections.Generic;
using UnityEngine;

public class CustomGUILabel : CustomController
{
    protected override void StyleOffDraw()
    {
        GUI.Label(guiPos.Pos, content);
    }

    protected override void StyleOnDraw()
    {
        GUI.Label(guiPos.Pos, content,style);
    }
}
标签是最简单的,只需要绘制出来就好,这里使用的都是父类中的信息。
这个时候在Unity编辑界面就制作一个空物体,命名为Root,挂载上脚本CustomGUIRoot,为其创建一个子物体Label,为Label挂在上脚本CustomGUILabel,这个时候就可以看到如下的界面

这样即使在不运行的情况下,我们创建除了一个Label,并且可以改变它的位置和对齐方式,这是在GUIPos选项卡中,改变width和height的值就可以改变这个Label的位置。
图片Texture
using System.Collections;
using System.Collections.Generic;
using UnityEngine;

public class CustomGUITexture : CustomController
{
    //缩放模式
    public ScaleMode scaleMode = ScaleMode.StretchToFill;
    protected override void StyleOffDraw()
    {
        GUI.DrawTexture(guiPos.Pos, content.image, scaleMode);
    }

    protected override void StyleOnDraw()
    {
        GUI.DrawTexture(guiPos.Pos, content.image, scaleMode);
    }
}
图片没啥好说的,就多加了一个缩放模式,这里的模式有三种,每种模式有什么不同可以参考Unity官方文档。
按钮Button
按钮有所不同,先上代码
using System.Collections;
using System.Collections.Generic;
using UnityEngine;
using UnityEngine.Events;

public class CustomGUIButton : CustomController
{
    //提供给外部点击的事件
    //只要给外部给予了响应函数就会执行
    public event UnityAction clickevent;

    protected override void StyleOffDraw()
    {
        if(GUI.Button(guiPos.Pos, content))
        {
            clickevent?.Invoke();
        }
    }

    protected override void StyleOnDraw()
    {
        if(GUI.Button(guiPos.Pos, content,style))
        {
            clickevent?.Invoke();
        }
    }
}
因为按钮和标签不一样,在点击按钮时需要响应,因此定义一个事件,在我们点击此按钮时,会响应这个事件。这样在外部为事件添加函数即可。这个在测试部分具体阐述。
输入框Input
using System.Collections;
using System.Collections.Generic;
using UnityEngine;
using UnityEngine.Events;

public class CustomGUIInput : CustomController
{
    public event UnityAction<string> textChange;

    private string oldStr = "";

    protected override void StyleOffDraw()
    {
        content.text = GUI.TextField(guiPos.Pos, content.text);
        if(oldStr != content.text)
        {
            textChange?.Invoke(oldStr);
            oldStr = content.text;
        }
    }

    protected override void StyleOnDraw()
    {
        content.text = GUI.TextField(guiPos.Pos, content.text,style);
        if (oldStr != content.text)
        {
            textChange?.Invoke(oldStr);
            oldStr = content.text;
        }
    }
}
输入框和按钮又有所不同,在一般情况下使用GUI中的TextField时,一般是这样使用的
string inputStr = "";
inputStr = GUI.TextField(new Rect(0, 0, 100, 30), inputStr);
必须要声明一个字符串来接收输入框的变化情况。
因此在CustomGUIInput中也要这么写,但是又声明了一个旧的oldStr,原因是为了只有在输入内容发生变化时才会调用事件响应函数,如果不这么做,那样的话在CustomGUIRoot类中的OnGUI中会一直调用事件,这样浪费了很多性能,使用一个oldStr来记录变化情况,这就避免了性能的浪费。
多选框Toggle
多选框和上面的iuput一样的道理,这里不多赘述
using System.Collections;
using System.Collections.Generic;
using UnityEngine;
using UnityEngine.Events;

public class CustomGUIToggle : CustomController
{
    public bool isSel;
    public event UnityAction<bool> changeValue;
    private bool isOldSel;

    protected override void StyleOffDraw()
    {
        isSel = GUI.Toggle(guiPos.Pos, isSel, content);
        //只有变化时  才告诉外部  执行函数  否则没有必要一致传参数
        if(isOldSel != isSel)
        {
            changeValue?.Invoke(isSel);
            isOldSel = isSel;
        }
    }

    protected override void StyleOnDraw()
    {
        isSel = GUI.Toggle(guiPos.Pos, isSel, content,style);
        if (isOldSel != isSel)
        {
            changeValue?.Invoke(isSel);
            isOldSel = isSel;
        }
    }
}
滑动条Slider
滑动条只是多了几个参数,此外还要分为水平和竖直的滑动条,因此可以定义一个枚举,在不同的情况下绘制不同的滑动条就可以了。还有一点就是,在选择自定义style后,滑动条有两个皮肤,一个是背景,一个是滑块,因此这里需要多定义一个GUIStyle。
using System.Collections;
using System.Collections.Generic;
using UnityEngine;
using UnityEngine.Events;

public enum E_Slider_Type
{
    Horizontal,
    Vertical,
}

public class CustomGUISlider : CustomController
{
    public float minValue = 0;
    public float maxValue = 1;
    //当前值
    public float nowValue = 0;

    public E_Slider_Type type = E_Slider_Type.Horizontal;

    public GUIStyle sliderStyle;

    public event UnityAction<float> changeValue;

    private float oldValue = 0f;

    protected override void StyleOffDraw()
    {
        switch (type)
        {
            case E_Slider_Type.Horizontal:
                nowValue = GUI.HorizontalSlider(guiPos.Pos, nowValue, minValue, maxValue);
                break;
            case E_Slider_Type.Vertical:
                nowValue = GUI.VerticalSlider(guiPos.Pos, nowValue, minValue, maxValue);
                break;
            default:
                break;
        }
        if(oldValue != nowValue)
        {
            changeValue?.Invoke(nowValue);
            oldValue = nowValue;
        }
    }

    protected override void StyleOnDraw()
    {
        switch (type)
        {
            case E_Slider_Type.Horizontal:
                nowValue = GUI.HorizontalSlider(guiPos.Pos, nowValue, minValue, maxValue,style,sliderStyle);
                break;
            case E_Slider_Type.Vertical:
                nowValue = GUI.VerticalSlider(guiPos.Pos, nowValue, minValue, maxValue, style, sliderStyle);
                break;
            default:
                break;
        }
        if (oldValue != nowValue)
        {
            changeValue?.Invoke(nowValue);
            oldValue = nowValue;
        }
    }
}
单选框
最麻烦的是单选框,单选框的要求是几个选项中必须选一个,不能空选,比如男女选项,必须选一个,不能多选,也不能不选。
使用多选框来完成。
using System.Collections;
using System.Collections.Generic;
using UnityEngine;

public class CustomGUIToggleGroup : MonoBehaviour
{
    public CustomGUIToggle[] toggles;

    //记录上一次为true的tiggle
    private CustomGUIToggle frontTrueTog;

    void Start()
    {
        if (toggles.Length == 0) return;

        //通过遍历  来为多个 多选框添加监听事件函数
        //在函数中做处理
        //当一个为true时  另外两个变为false
        for (int i = 0; i < toggles.Length; i++)
        {
            CustomGUIToggle toggle = toggles[i];
            toggle.changeValue += (value) =>
            {
                //当传入的value为true时  需要把另外两个变为false
                if (value)
                {
                    for (int j = 0; j < toggles.Length; j++)
                    {
                        //这里有闭包  toggle就是上一个函数中声明的变量
                        //改变了它的生命周期
                        if (toggles[j] != toggle)
                        {
                            toggles[j].isSel = false;
                        }
                    }
                    //记录上一次为true的toggle
                    frontTrueTog = toggle;
                }
                //来判断 当前变成false的这个toggle是不是上一次为true
                //如果是 就不应该让它变成false
                else if (toggle == frontTrueTog)
                {
                    //强制转换为true
                    toggle.isSel = true;
                }
            };
        }
    }


}
在使用该单选框时,需要首先创建几个多选款,然后在编辑界面将他们设置为CustomGUIToggle的元素。然后必须要运行才可以显示出效果,也就是只能在多个选项中选一个。
这里代码的逻辑就是记录某一个多选框中的值的变化情况,有一个变化为true,那么其他的就要强制变为false,但是为了做到不空选,所以还要在变化是同一个toggle时,强制将其变化为true。
测试
请注意:首先在Root没有子对象的情况下将其设置为预制体,其他的也是这样,创建对应名称的子物体,然后挂载上对应的脚本,在设置为预制体,这样就可以起到和UGUI类似的作用了,以下是一个示例
如图,创建一个空物体,挂载上测试脚本,然后添加子物体Root,Root中再从预制体中拖入相应的控件,最终效果如下:

简单的创建了一个面板,点击面板中的按钮,效果如Console框中的打印结果。注意:需要先运行游戏再点击按钮才有效果
这是测试脚本
using System.Collections;
using System.Collections.Generic;
using UnityEngine;

public class TestScript : MonoBehaviour
{
    public CustomGUIButton startButton;
    public CustomGUIButton exitButton;
    void Start()
    {
         startButton.clickevent += () =>
         {
             Debug.Log("进入游戏");
         };

          exitButton.clickevent += () =>
          {
              gameObject.SetActive(false);
          };
    }

    // Update is called once per frame
    void Update()
    {

    }
}
就和之前说的那样,只需要为按钮的事件添加函数即可响应按钮点击。
这个UI界面是会根据屏幕分辨率自适应的,这里做到的是位置自适应,大小还没做。如下图
 文章来源:https://www.toymoban.com/news/detail-756063.html
可以看到,即使我改变Game的大小,整个面板还是保持在屏幕中央。文章来源地址https://www.toymoban.com/news/detail-756063.html
到了这里,关于Unity使用GUI封装一个UI系统的文章就介绍完了。如果您还想了解更多内容,请在右上角搜索TOY模板网以前的文章或继续浏览下面的相关文章,希望大家以后多多支持TOY模板网!