1. 下载HBuilderX
https://www.dcloud.io/hbuilderx.html?ivk_sa=1024320u
2. 下载uView初始框架
https://ext.dcloud.net.cn/plugin?id=1593
3. 开始学习
1.更改页面背景色,渐变色
<style>
	 page{
		  background-image: linear-gradient(to bottom, #f8f6e7 0%, #f8f6eb 25%,  #f6f5ed 50%, #f6f5f3 100%); /* 多个渐变色 */
	 }
</style>
2.获取屏幕高度和宽度
uni.getSystemInfo({
  success: (res) => {
	this.screenHeight = res.windowHeight + 'px';
	this.screenWidth = res.windowWidth + 'px';
	console.log('屏幕宽度:', this.screenWidth);
	console.log('屏幕高度:', this.screenHeight);
  },
});
3.使用 gt-axios-request 发送请求
// 插件市场安装
1. https://ext.dcloud.net.cn/plugin?id=5672
2. 在@/uni_modules/gt-axios-request/目录下, 安装 axios npm install
3. 修改配置 如下
(1). 修改config.js中的API接口 如下:
'@/uni_modules/gt-axios-request/js_sdk/config.js'
axios.defaults.baseURL = '你要修改的服务器地址'

(2)、在项目的main.js文件中引入install.js 如下:
// 引入 gt-axios-request
import { install as http } from '@/uni_modules/gt-axios-request/js_sdk/install.js'
Vue.use(http)

(3). api/index.js 如下:
export const TEST_DATA = '/game/list'
export const GAME_DATA = '/game/data'

(4)、在pages文件中直接使用 如下:
import { GAME_DATA, TEST_DATA } from 'api'

receiveCMS() {
    const data = {
        "Page": 1,
        "Limit": 10
    }
    this.$http.post(TEST_DATA, data, { showLoading: true }).then(res => {
        console.log("🚀 ~ file: index.vue ~ line 33 ~ this.$http.post ~ res", res)
    })
},
async receiveCMSAsync() {
    const data = {
        "Page": 1,
        "Limit": 10
    }
    const res = await this.$http.post(TEST_DATA, data)
    console.log("🚀 ~ file: index.vue ~ line 43 ~ receiveCMSAsync ~ res", res)
},
receiveMember() {
    // 开启缓存,设置缓存时间为一个小时,缓存的模式为localStorage
    const data = {}
    this.$http.get(GAME_DATA, data).then(res => {
        console.log("🚀 ~ file: index.vue ~ line 47 ~ this.$http.get ~ res", res)
    })
},
async receiveMemberAsync() {
    // 开启缓存,设置缓存时间为一个小时,缓存的模式为localStorage
    const data = {}
    const res = await this.$http.get(GAME_DATA, data, { showLoading: true, cache: true, expires: 1000 * 60 * 60 })
    console.log("🚀 ~ file: index.vue ~ line 54 ~ receiveMemberAsync ~ res", res)
}
4.登录页demo
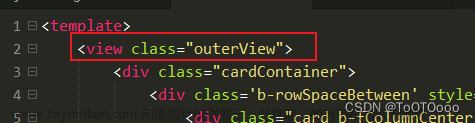
<template>
	<view :style="{'height':screenHeight}">
		<view class="loginHead"></view>
		<view class="loginBody">
			<u-form>
			<u-row class="input1 shadow1">
				<u-input border="bottom" v-model="userName" placeholder="用户名:">
					<u-icon
					slot="prefix"
					style="margin-right: 5px;"
					type="tips"
					name="/static/login-img/u1.png">
					</u-icon>
				</u-input>
			</u-row>
			<u-row class="input1 shadow1" style="margin-bottom: 30px;">
				<u-input border="bottom" v-model="password" type="password" placeholder="密码:">
					<u-icon
					slot="prefix"
					type="tips"
					style="margin-right: 5px;"
					name="/static/login-img/lock.png">
					</u-icon>
				</u-input>
			</u-row>
			<u-row class="button1">
				<u-button shape="circle" color="#fbd878" :hairline="true" text="登录" @click="getLogin"></u-button>
			</u-row>
			<u-row class="button1">
				<u-button shape="circle" color="#fbd878":plain="true" :hairline="true" text="注册"></u-button>
			</u-row>
			</u-form>
		</view>
		<view class="loginEnd"></view>
	</view>
</template>
<script>
	import { LOGIN } from '@/api/index'
	export default {
		created() {
			// 获取屏幕高度和宽度
			this.getScreenSize()
		},
		data() {
			return {
				screenWidth: '100px',
				screenHeight: '300px',
				userName: '',
				password: ''
			}
		},
		methods: {
			getScreenSize() {
				uni.getSystemInfo({
				  success: (res) => {
					this.screenHeight = res.windowHeight + 'px';
					this.screenWidth = res.windowWidth + 'px';
					console.log('屏幕宽度:', this.screenWidth);
					console.log('屏幕高度:', this.screenHeight);
				  },
				});
			},
			getLogin() {
				const data = {
					"userName": this.userName,
					"password": this.password
				}
				this.$http.post(LOGIN, data, { showLoading: true }).then(res => {
					console.log("🚀 ~ file: index.vue ~ line 33 ~ this.$http.post ~ res", res)
				})
			}

		}
	}
</script>

<style>
	 page{
		  background-image: linear-gradient(to bottom, #f8f6e7 0%, #f8f6eb 25%,  #f6f5ed 50%, #f6f5f3 100%); /* 多个渐变色 */
	 }
	 .loginHead {
		 height: 20%;display: flex;
	 }
	 .loginBody {
		 height: 60%;
	 }
	 .loginEnd {
		 height: 20%;display: flex;
	 }
	 .wrap {
		padding-left: 5%;
	 }
	 .input1 {
		 background-color: white; border-radius: 12px;width: 90%;margin-left: 5%;margin-right: 5%;margin-top: 14px;
	 }
	 .shadow1 {
		box-shadow:5px 5px 10px #e6e5dc;
	 }
	 .button1 {
		width: 80%;margin-left: 10%;margin-right: 10%;margin-top: 14px;
	 }
</style>
 文章来源地址https://www.toymoban.com/news/detail-772592.html
文章来源:https://www.toymoban.com/news/detail-772592.html
到了这里,关于uniapp学习之路的文章就介绍完了。如果您还想了解更多内容,请在右上角搜索TOY模板网以前的文章或继续浏览下面的相关文章,希望大家以后多多支持TOY模板网!