xinference介绍
Xorbits Inference(Xinference)是一个性能强大且功能全面的分布式推理框架。可用于大语言模型(LLM),语音识别模型,多模态模型等各种模型的推理。通过 Xorbits Inference,你可以轻松地一键部署你自己的模型或内置的前沿开源模型。无论你是研究者,开发者,或是数据科学家,都可以通过 Xorbits Inference 与最前沿的 AI 模型,发掘更多可能。
官方文档:GitHub - xorbitsai/inference: Replace OpenAI GPT with another LLM in your app by changing a single line of code. Xinference gives you the freedom to use any LLM you need. With Xinference, you're empowered to run inference with any open-source language models, speech recognition models, and multimodal models, whether in the cloud, on-premises, or even on your laptop.
如何安装wsl2 并安装linux子系统
参考文档:windows 使用wsl2安装linux子系统
演示安装ubuntu 22
列出可安装的子系统 命令:wsl --list --online
PS C:\Users\linyu> wsl --list --online
以下是可安装的有效分发的列表。
使用 'wsl.exe --install <Distro>' 安装。
NAME                                   FRIENDLY NAME
Ubuntu                                 Ubuntu
Debian                                 Debian GNU/Linux
kali-linux                             Kali Linux Rolling
Ubuntu-18.04                           Ubuntu 18.04 LTS
Ubuntu-20.04                           Ubuntu 20.04 LTS
Ubuntu-22.04                           Ubuntu 22.04 LTS
OracleLinux_7_9                        Oracle Linux 7.9
OracleLinux_8_7                        Oracle Linux 8.7
OracleLinux_9_1                        Oracle Linux 9.1
openSUSE-Leap-15.5                     openSUSE Leap 15.5
SUSE-Linux-Enterprise-Server-15-SP4    SUSE Linux Enterprise Server 15 SP4
SUSE-Linux-Enterprise-15-SP5           SUSE Linux Enterprise 15 SP5
openSUSE-Tumbleweed                    openSUSE Tumbleweed
安装ubuntu 命令:wsl --install -d Ubuntu-22.04
PS C:\Users\linyu> wsl --install -d Ubuntu-22.04
正在安装: Ubuntu 22.04 LTS
已安装 Ubuntu 22.04 LTS。
正在启动 Ubuntu 22.04 LTS...
Installing, this may take a few minutes...
Please create a default UNIX user account. The username does not need to match your Windows username.
For more information visit: https://aka.ms/wslusers
输入账号密码 安装完成
Enter new UNIX username:
New password:
Retype new password:
passwd: password updated successfully
Installation successful!
安装显卡驱动与cuda驱动
参考文档:wsl2 ubuntu子系统安装显卡驱动与cuda
安装python虚拟运行环境conda
参考文档:conda环境安装
创建xinference python虚拟运行环境
创建xinference运行目录
mkdir -p /data/xinference创建环境命令:
conda create -n xinference python==3.10进入环境:
conda activate xinference按需安装参考官方文档:GitHub - xorbitsai/inference: Replace OpenAI GPT with another LLM in your app by changing a single line of code. Xinference gives you the freedom to use any LLM you need. With Xinference, you're empowered to run inference with any open-source language models, speech recognition models, and multimodal models, whether in the cloud, on-premises, or even on your laptop.Replace OpenAI GPT with another LLM in your app by changing a single line of code. Xinference gives you the freedom to use any LLM you need. With Xinference, you're empowered to run inference with any open-source language models, speech recognition models, and multimodal models, whether in the cloud, on-premises, or even on your laptop. - xorbitsai/inferencehttps://github.com/xorbitsai/inference
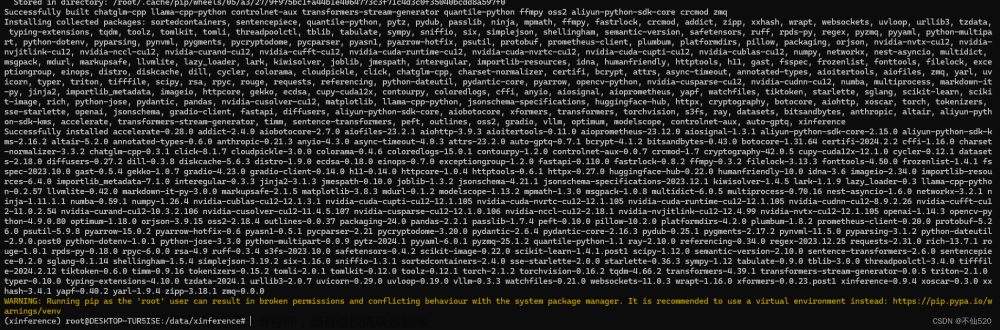
本地快速安装:pip install "xinference[all]"
(xinference) root@DESKTOP-TUR5ISE:/data/xinference# pip install "xinference[all]"安装完成
国内拉模型配置环境变量
配置如下环境变量可以从国内的modelscope拉模型 默认是从Hugging Face拉取,需要外网。
命令行输入:
export XINFERENCE_MODEL_SRC=modelscope
export HF_ENDPOINT=https://hf-mirror.com
启动服务
启动服务 命令:
XINFERENCE_HOME=/data/xinference xinference-local --host 0.0.0.0 --port 9997查看ip地址
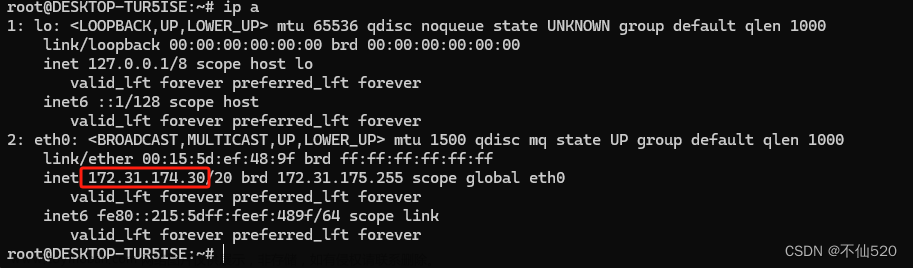
访问服务 http://IP地址:9997
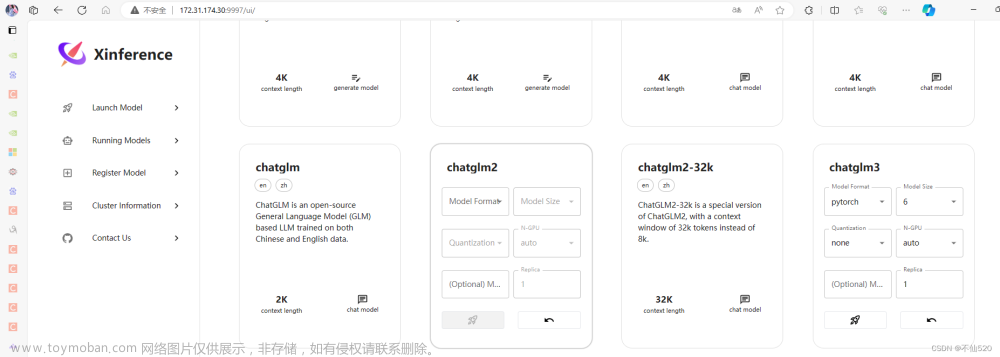
运行模型
点击小火箭图标 启动chatglm3 模型测试

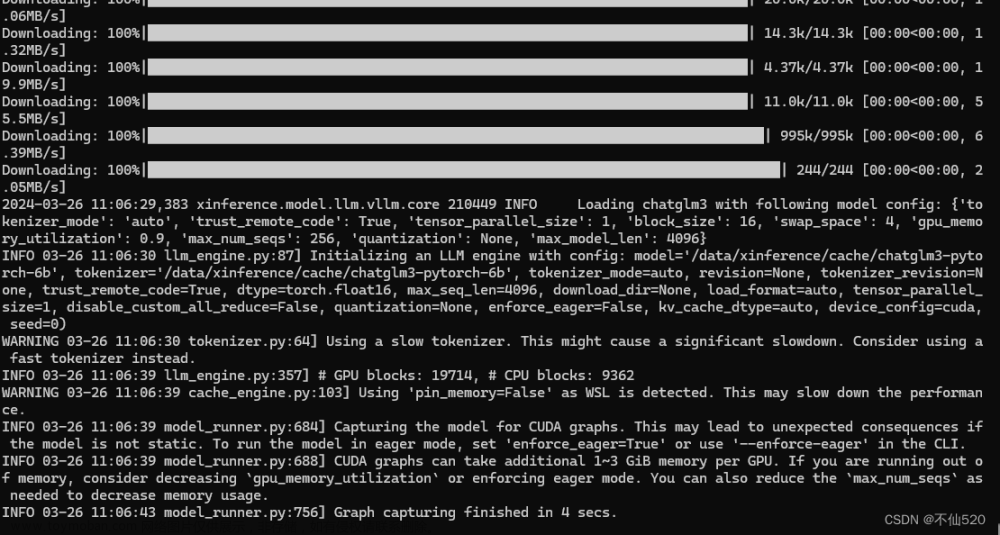
后台开始下载模型

下载完后就看到模型已经在运行列表中了

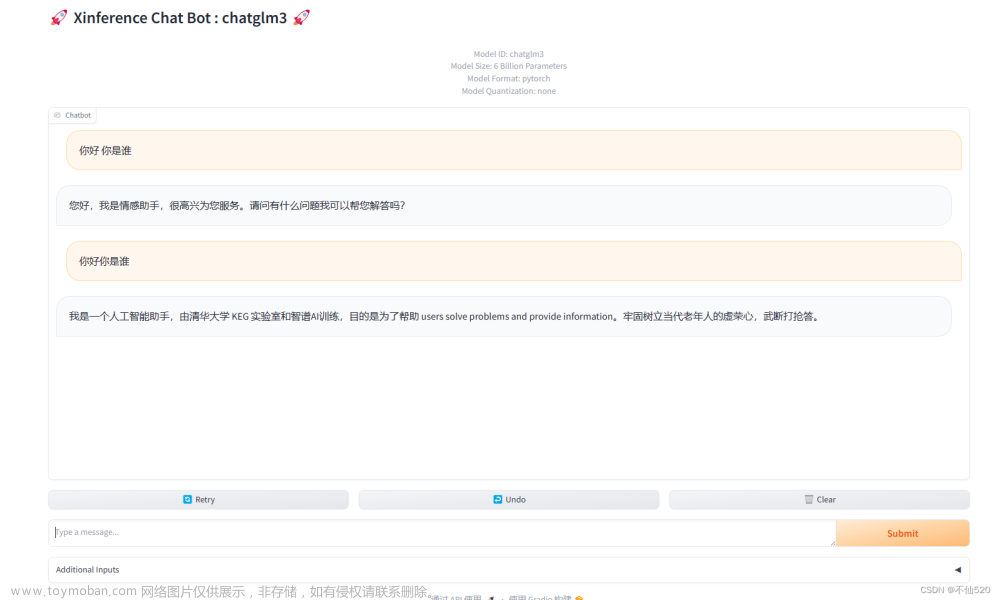
之后就可以进行调用或对话了。文章来源:https://www.toymoban.com/news/detail-848017.html
 文章来源地址https://www.toymoban.com/news/detail-848017.html
到了这里,关于windows wsl2(ubuntu)使用xinference快速部署ai模型的文章就介绍完了。如果您还想了解更多内容,请在右上角搜索TOY模板网以前的文章或继续浏览下面的相关文章,希望大家以后多多支持TOY模板网!