前言
之前虽然单独讲过Security Client和Resource Server的对接,但是都是基于Spring webmvc的,Gateway这种非阻塞式的网关是基于webflux的,对于集成Security相关内容略有不同,且涉及到代理其它微服务,所以会稍微比较麻烦些,今天就带大家来实现Gateway网关对接OAuth2认证服务。
Gateway对接说明
身份问题
在本次示例中网关既是客户端(OAuth2 Client Server)又是资源服务(OAuth2 Resource Server),Client服务负责认证,Resource负责鉴权,这样如果有在浏览器直接访问网关的需要可以直接在浏览器由框架引导完成OAuth2认证过程。
框架版本与架构说明
架构图

Spring Cloud依赖版本
| 框架 | 版本号 |
|---|---|
| Spring Boot | 3.1.0 |
| Nacos Server | 2.2.1 |
| Spring Cloud | 2022.0.4 |
| Spring Cloud Alibaba | 2022.0.0.0 |
| Spring Security | 6.1.0 |
| Spring OAuth2 Client | 6.1.0 |
| Spring OAuth2 Resource Server | 6.1.0 |
读者可以自选版本使用,作为对接方版本问题不大;不确定Spring Cloud Alibaba 在部署时会不会有Spring Boot的版本限制,如果3.1.x无法使用请降级至3.0.10版本,开发时测试都是没问题的。
网关集成认证服务请求流程图说明
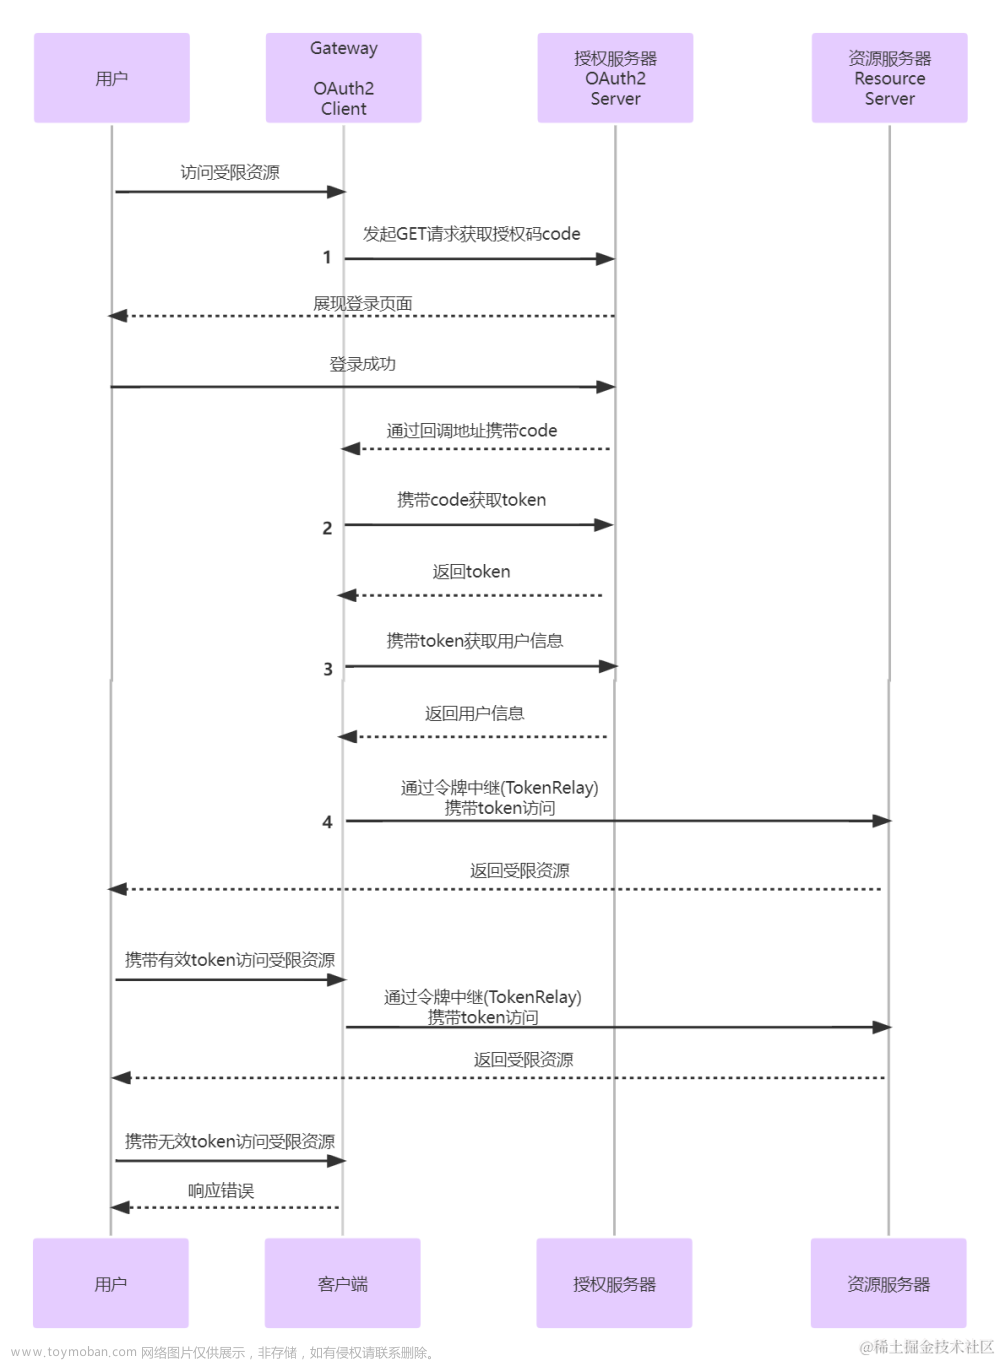
- 用户请求受限资源
- 网关检测没有认证信息,通过
RedirectServerAuthenticationEntryPoint处理并发起OAuth2登录授权申请 - 授权申请到达认证服务,认证服务检测到未登录重定向至登录页面并展示给用户
- 用户登录成功后请求重定向至授权申请接口,通过校验后携带Token重定向至回调地址(redirect_uri),注意:这里回调地址要设置为网关的地址,htttp://{网关ip}:{网关port}/login/oauth2/code/{registrationId},后边的
/login/oauth2/code/{registrationId}路径是固定的,这是框架(Security OAuth2 Client)自带的端点 - 请求到达网关,由
OAuth2LoginAuthenticationWebFilter拦截并调用父类AuthenticationWebFilter的filter方法进行处理 -
AuthenticationWebFilter调用OidcAuthorizationCodeReactiveAuthenticationManager或OAuth2LoginReactiveAuthenticationManager类处理(由授权申请的scope决定,包含openid就走OidcAuthorizationCodeReactiveAuthenticationManager,否则走另一个) - 在获取AccessToken成功以后调用
ReactiveOAuth2UserService获取用户信息 - 获取到用户信息后会解析并将认证信息保存至
ReactiveSecurityContextHolder中 - 完成这一系列的认证之后会重定向至最一开始请求的受限资源,这时候就能获取到认证信息了
- 如果访问的是被网关代理的服务则会通过令牌中继(TokenRelay)携带token访问
这就是网关通过认证服务获取认证信息的一个流程,基本上只需要添加配置文件即可由框架引导进行OAuth2认证流程。
开始编码
前置条件
- 搭建好标准OAuth2认证服务
- 搭建nacos服务
项目结构
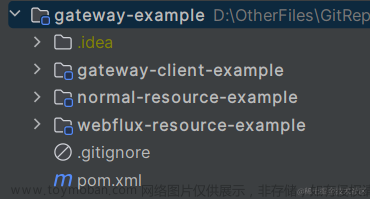
gateway-example # 父模块
 │
 ├─gateway-client-example # 网关
 │
 ├─normal-resource-example # webmvc资源服务
 │
 ├─webflux-resource-example # webflux资源服务
 │
 └─pom.xml # 公共依赖,依赖管理
创建一个空的maven项目
引入Spring Boot、Spring Cloud、Spring Cloud Alibaba,如下
<?xml version="1.0" encoding="UTF-8"?>
<project xmlns="http://maven.apache.org/POM/4.0.0" xmlns:xsi="http://www.w3.org/2001/XMLSchema-instance"
         xsi:schemaLocation="http://maven.apache.org/POM/4.0.0 https://maven.apache.org/xsd/maven-4.0.0.xsd">
    <modelVersion>4.0.0</modelVersion>
    <parent>
        <groupId>org.springframework.boot</groupId>
        <artifactId>spring-boot-starter-parent</artifactId>
        <version>3.1.0</version>
        <relativePath/> <!-- lookup parent from repository -->
    </parent>
    <groupId>com.example</groupId>
    <artifactId>gateway-example</artifactId>
    <version>0.0.1</version>
    <packaging>pom</packaging>
    <name>gateway-example</name>
    <description>gateway-example</description>
    <modules>
        <module>gateway-client-example</module>
        <module>normal-resource-example</module>
        <module>webflux-resource-example</module>
    </modules>

    <properties>
        <java.version>17</java.version>
        <!-- 修复漏洞 -->
        <snakeyaml.version>2.0</snakeyaml.version>
        <!-- Spring Cloud版本号 -->
        <spring-cloud.version>2022.0.4</spring-cloud.version>
        <!-- Spring Cloud Alibaba版本号 -->
        <spring-cloud-alibaba.version>2022.0.0.0</spring-cloud-alibaba.version>
    </properties>

    <dependencies>
        <!-- Lombok -->
        <dependency>
            <groupId>org.projectlombok</groupId>
            <artifactId>lombok</artifactId>
            <optional>true</optional>
        </dependency>

        <!-- Spring Boot 测试依赖 -->
        <dependency>
            <groupId>org.springframework.boot</groupId>
            <artifactId>spring-boot-starter-test</artifactId>
            <scope>test</scope>
        </dependency>

        <!-- 服务注册与发现 -->
        <dependency>
            <groupId>com.alibaba.cloud</groupId>
            <artifactId>spring-cloud-starter-alibaba-nacos-discovery</artifactId>
        </dependency>
        <!-- 配置中心 -->
        <dependency>
            <groupId>com.alibaba.cloud</groupId>
            <artifactId>spring-cloud-starter-alibaba-nacos-config</artifactId>
        </dependency>

        <!-- 资源服务器starter -->
        <dependency>
            <groupId>org.springframework.boot</groupId>
            <artifactId>spring-boot-starter-oauth2-resource-server</artifactId>
        </dependency>
    </dependencies>

    <dependencyManagement>
        <dependencies>
            <dependency>
                <groupId>org.springframework.cloud</groupId>
                <artifactId>spring-cloud-dependencies</artifactId>
                <version>${spring-cloud.version}</version>
                <type>pom</type>
                <scope>import</scope>
            </dependency>
            <dependency>
                <groupId>com.alibaba.cloud</groupId>
                <artifactId>spring-cloud-alibaba-dependencies</artifactId>
                <version>${spring-cloud-alibaba.version}</version>
                <type>pom</type>
                <scope>import</scope>
            </dependency>
        </dependencies>
    </dependencyManagement>

</project>
里边的modules标签是在新建module时自动添加的
创建网关gateway-client-example模块
Spring Cloud 相关依赖已经在parent模块中引入,所以该模块只需要引入Gateway、Client依赖,pom如下
<?xml version="1.0" encoding="UTF-8"?>
<project xmlns="http://maven.apache.org/POM/4.0.0"
         xmlns:xsi="http://www.w3.org/2001/XMLSchema-instance"
         xsi:schemaLocation="http://maven.apache.org/POM/4.0.0 http://maven.apache.org/xsd/maven-4.0.0.xsd">
    <modelVersion>4.0.0</modelVersion>
    <parent>
        <groupId>com.example</groupId>
        <artifactId>gateway-example</artifactId>
        <version>0.0.1</version>
    </parent>

    <artifactId>gateway-client-example</artifactId>
    <name>gateway-client-example</name>
    <description>gateway-client-example</description>

    <dependencies>
        <dependency>
            <groupId>org.springframework.boot</groupId>
            <artifactId>spring-boot-starter-oauth2-client</artifactId>
        </dependency>
        <dependency>
            <groupId>org.springframework.boot</groupId>
            <artifactId>spring-boot-starter-webflux</artifactId>
        </dependency>
        <dependency>
            <groupId>org.springframework.cloud</groupId>
            <artifactId>spring-cloud-starter-gateway</artifactId>
        </dependency>
        <dependency>
            <groupId>io.projectreactor</groupId>
            <artifactId>reactor-test</artifactId>
            <scope>test</scope>
        </dependency>

        <!-- 负载均衡依赖 -->
        <dependency>
            <groupId>org.springframework.cloud</groupId>
            <artifactId>spring-cloud-starter-loadbalancer</artifactId>
        </dependency>
    </dependencies>

    <build>
        <plugins>
            <plugin>
                <groupId>org.springframework.boot</groupId>
                <artifactId>spring-boot-maven-plugin</artifactId>
                <configuration>
                    <excludes>
                        <exclude>
                            <groupId>org.projectlombok</groupId>
                            <artifactId>lombok</artifactId>
                        </exclude>
                    </excludes>
                </configuration>
            </plugin>
        </plugins>
    </build>

</project>
编写客户端配置
package com.example.config;

import org.springframework.context.annotation.Bean;
import org.springframework.context.annotation.Configuration;
import org.springframework.security.core.GrantedAuthority;
import org.springframework.security.core.authority.SimpleGrantedAuthority;
import org.springframework.security.core.authority.mapping.GrantedAuthoritiesMapper;
import org.springframework.security.oauth2.core.user.OAuth2UserAuthority;

import java.util.Collection;
import java.util.HashSet;
import java.util.Set;

/**
 * 客户端配置
 *
 * @author vains
 */
@Configuration
public class ClientServerConfig {

    /**
     * 解析用户权限信息(当在浏览器中直接访问接口,框架自动调用OIDC流程登录时会用到该配置)
     *
     * @return GrantedAuthoritiesMapper
     */
    @Bean
    public GrantedAuthoritiesMapper userAuthoritiesMapper() {
        return (authorities) -> {
            Set<GrantedAuthority> mappedAuthorities = new HashSet<>();

            authorities.forEach(authority -> {
                if (authority instanceof OAuth2UserAuthority oAuth2UserAuthority) {
                    // 从认证服务获取的用户信息中提取权限信息
                    Object userAuthorities = oAuth2UserAuthority.getAttributes().get("authorities");
                    if (userAuthorities instanceof Collection<?> collection) {
                        // 转为SimpleGrantedAuthority的实例并插入mappedAuthorities中
                        collection.stream().filter(a -> a instanceof String)
                                .map(String::valueOf)
                                .map(SimpleGrantedAuthority::new)
                                .forEach(mappedAuthorities::add);
                    }
                }
            });

            return mappedAuthorities;
        };
    }


}
该配置会在获取到用户信息后解析用户的权限信息,详见文档
编写网关资源服务配置
package com.example.config;

import org.springframework.context.annotation.Bean;
import org.springframework.context.annotation.Configuration;
import org.springframework.core.convert.converter.Converter;
import org.springframework.security.authentication.AbstractAuthenticationToken;
import org.springframework.security.config.Customizer;
import org.springframework.security.config.annotation.method.configuration.EnableReactiveMethodSecurity;
import org.springframework.security.config.annotation.web.reactive.EnableWebFluxSecurity;
import org.springframework.security.config.web.server.ServerHttpSecurity;
import org.springframework.security.oauth2.jwt.Jwt;
import org.springframework.security.oauth2.server.resource.authentication.JwtAuthenticationConverter;
import org.springframework.security.oauth2.server.resource.authentication.JwtGrantedAuthoritiesConverter;
import org.springframework.security.oauth2.server.resource.authentication.ReactiveJwtAuthenticationConverterAdapter;
import org.springframework.security.web.server.SecurityWebFilterChain;
import reactor.core.publisher.Mono;

/**
 * 资源服务器配置
 *
 * @author vains
 */
@Configuration
@EnableWebFluxSecurity
@EnableReactiveMethodSecurity
public class ResourceServerConfig {

    /**
     * 配置认证相关的过滤器链
     *
     * @param http Spring Security的核心配置类
     * @return 过滤器链
     */
    @Bean
    public SecurityWebFilterChain defaultSecurityFilterChain(ServerHttpSecurity http) {
        // 禁用csrf与cors
        http.csrf(ServerHttpSecurity.CsrfSpec::disable);
        http.cors(ServerHttpSecurity.CorsSpec::disable);

        // 开启全局验证
        http.authorizeExchange((authorize) -> authorize
                //全部需要认证
                .anyExchange().authenticated()
        );

        // 开启OAuth2登录
        http.oauth2Login(Customizer.withDefaults());

        // 设置当前服务为资源服务,解析请求头中的token
        http.oauth2ResourceServer((resourceServer) -> resourceServer
                        // 使用jwt
                        .jwt(jwt -> jwt
                                // 请求中携带token访问时会触发该解析器适配器
                                .jwtAuthenticationConverter(grantedAuthoritiesExtractor())
                        )
                /*
                // xhr请求未携带Token处理
                .authenticationEntryPoint(this::authenticationEntryPoint)
                // 权限不足处理
                .accessDeniedHandler(this::accessDeniedHandler)
                // Token解析失败处理
                .authenticationFailureHandler(this::failureHandler)
                */
        );

        return http.build();
    }

    /**
     * 自定义jwt解析器,设置解析出来的权限信息的前缀与在jwt中的key
     *
     * @return jwt解析器适配器 ReactiveJwtAuthenticationConverterAdapter
     */
    public Converter<Jwt, Mono<AbstractAuthenticationToken>> grantedAuthoritiesExtractor() {
        JwtGrantedAuthoritiesConverter grantedAuthoritiesConverter = new JwtGrantedAuthoritiesConverter();
        // 设置解析权限信息的前缀,设置为空是去掉前缀
        grantedAuthoritiesConverter.setAuthorityPrefix("");
        // 设置权限信息在jwt claims中的key
        grantedAuthoritiesConverter.setAuthoritiesClaimName("authorities");

        JwtAuthenticationConverter jwtAuthenticationConverter = new JwtAuthenticationConverter();
        jwtAuthenticationConverter.setJwtGrantedAuthoritiesConverter(grantedAuthoritiesConverter);
        return new ReactiveJwtAuthenticationConverterAdapter(jwtAuthenticationConverter);
    }

}
需要注意的是开启方法级别鉴权的注解变了,webflux的注解和webmvc的注解不一样,并且过滤器链也换成SecurityWebFilterChain了;jwt自定义解析器的方式也不一致,实现方式见上方代码
说明文档如下
EnableReactiveMethodSecurity注解文档
Jwt解析器适配器详见文档
编写application.yml,添加nacos配置
spring:
  cloud:
    nacos:
      serverAddr: 127.0.0.1:8848
  config:
    import:
      - nacos:gateway.yml?refresh=true
  application:
    name: gateway
在nacos中创建gateway.yml配置文件
添加客户端与资源服务配置,并添加其它资源服务的代理配置
server:
  port: 7000
spring:
  security:
    oauth2:
      # 资源服务器配置
      resourceserver:
        jwt:
          # Jwt中claims的iss属性,也就是jwt的签发地址,即认证服务器的根路径
          # 资源服务器会进一步的配置,通过该地址获取公钥以解析jwt
          issuer-uri: http://192.168.119.1:8080
      client:
        provider:
          # 认证提供者,自定义名称
          custom-issuer:
            # Token签发地址(认证服务地址)
            issuer-uri: http://192.168.119.1:8080
            # 获取用户信息的地址,默认的/userinfo端点需要IdToken获取,为避免麻烦自定一个用户信息接口
            user-info-uri: ${spring.security.oauth2.client.provider.custom-issuer.issuer-uri}/user
            user-name-attribute: name
        registration:
          messaging-client-oidc:
            # oauth认证提供者配置,和上边配置的认证提供者关联起来
            provider: custom-issuer
            # 客户端名称,自定义
            client-name: gateway
            # 客户端id,从认证服务申请的客户端id
            client-id: messaging-client
            # 客户端秘钥
            client-secret: 123456
            # 客户端认证方式
            client-authentication-method: client_secret_basic
            # 获取Token使用的授权流程
            authorization-grant-type: authorization_code
            # 回调地址,这里设置为Spring Security Client默认实现使用code换取token的接口,当前服务(gateway网关)的地址
            redirect-uri: http://127.0.0.1:7000/login/oauth2/code/messaging-client-oidc
            scope:
              - message.read
              - message.write
              - openid
              - profile

  cloud:
    gateway:
      default-filters:
        # 令牌中继
        - TokenRelay=
        # 代理路径,代理至服务后会去除第一个路径的内容
        - StripPrefix=1
      routes:
        # 资源服务代理配置
        - id: resource
          uri: lb://resource
          predicates:
            - Path=/resource/**
        # 资源服务代理配置
        - id: webflux
          uri: lb://webflux-resource
          predicates:
            - Path=/webflux/**
注意:配置文件中令牌中继(TokenRelay)的配置就是添加一个filter:TokenRelay=; 当网关引入spring-boot-starter-oauth2-client依赖并设置spring.security.oauth2.client.*属性时,会自动创建一个TokenRelayGatewayFilterFactory过滤器,它会从认证信息中获取access token,并放入下游请求的请求头中。 详见Gateway关于TokenRelay的文档
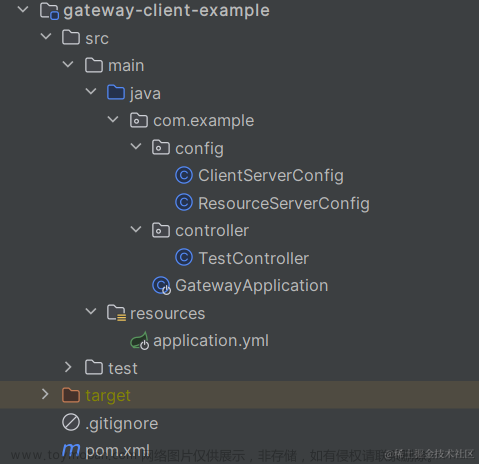
项目结构
创建webmvc资源服务模块normal-resource-example
在pom.xml中添加web依赖,如下
<?xml version="1.0" encoding="UTF-8"?>
<project xmlns="http://maven.apache.org/POM/4.0.0"
         xmlns:xsi="http://www.w3.org/2001/XMLSchema-instance"
         xsi:schemaLocation="http://maven.apache.org/POM/4.0.0 https://maven.apache.org/xsd/maven-4.0.0.xsd">
    <modelVersion>4.0.0</modelVersion>
    <parent>
        <groupId>com.example</groupId>
        <artifactId>gateway-example</artifactId>
        <version>0.0.1</version>
    </parent>

    <artifactId>normal-resource-example</artifactId>
    <name>normal-resource-example</name>
    <description>normal-resource-example</description>

    <dependencies>
        <dependency>
            <groupId>org.springframework.boot</groupId>
            <artifactId>spring-boot-starter-web</artifactId>
        </dependency>
    </dependencies>

    <build>
        <plugins>
            <plugin>
                <groupId>org.springframework.boot</groupId>
                <artifactId>spring-boot-maven-plugin</artifactId>
                <configuration>
                    <excludes>
                        <exclude>
                            <groupId>org.projectlombok</groupId>
                            <artifactId>lombok</artifactId>
                        </exclude>
                    </excludes>
                </configuration>
            </plugin>
        </plugins>
    </build>

</project>
创建资源服务器配置,添加自定义jwt解析器
package com.example.config;

import org.springframework.context.annotation.Bean;
import org.springframework.context.annotation.Configuration;
import org.springframework.security.config.annotation.method.configuration.EnableMethodSecurity;
import org.springframework.security.config.annotation.web.configuration.EnableWebSecurity;
import org.springframework.security.oauth2.server.resource.authentication.JwtAuthenticationConverter;
import org.springframework.security.oauth2.server.resource.authentication.JwtGrantedAuthoritiesConverter;

/**
 * 资源服务器配置
 *
 * @author vains
 */
@Configuration
@EnableWebSecurity
@EnableMethodSecurity(jsr250Enabled = true, securedEnabled = true)
public class ResourceServerConfig {

    /**
     * 自定义jwt解析器,设置解析出来的权限信息的前缀与在jwt中的key
     *
     * @return jwt解析器 JwtAuthenticationConverter
     */
    @Bean
    public JwtAuthenticationConverter jwtAuthenticationConverter() {
        JwtGrantedAuthoritiesConverter grantedAuthoritiesConverter = new JwtGrantedAuthoritiesConverter();
        // 设置解析权限信息的前缀,设置为空是去掉前缀
        grantedAuthoritiesConverter.setAuthorityPrefix("");
        // 设置权限信息在jwt claims中的key
        grantedAuthoritiesConverter.setAuthoritiesClaimName("authorities");

        JwtAuthenticationConverter jwtAuthenticationConverter = new JwtAuthenticationConverter();
        jwtAuthenticationConverter.setJwtGrantedAuthoritiesConverter(grantedAuthoritiesConverter);
        return jwtAuthenticationConverter;
    }

}
编写application.yml添加nacos配置
spring:
  cloud:
    nacos:
      serverAddr: 127.0.0.1:8848
  config:
    import:
      - nacos:resource.yml?refresh=true
  application:
    name: resource
在nacos中创建resource.yml配置文件,添加资源服务配置
server:
  port: 7100

spring:
  security:
    oauth2:
      # 资源服务器配置
      resourceserver:
        jwt:
          # Jwt中claims的iss属性,也就是jwt的签发地址,即认证服务器的根路径
          # 资源服务器会进一步的配置,通过该地址获取公钥以解析jwt
          issuer-uri: http://192.168.119.1:8080
注意端口,不能与网关和认证服务重复
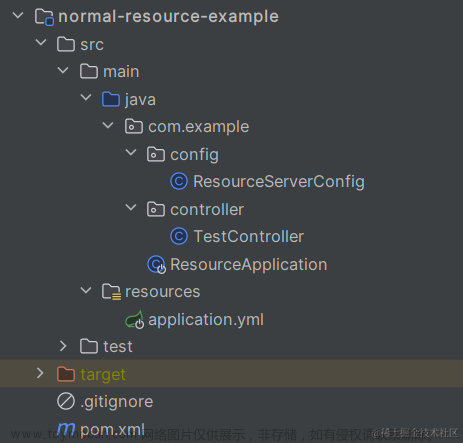
模块结构
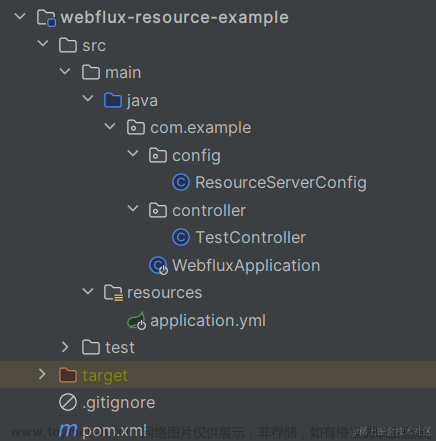
创建webflux资源服务模块
pom.xml添加webflux依赖,如下
<?xml version="1.0" encoding="UTF-8"?>
<project xmlns="http://maven.apache.org/POM/4.0.0"
         xmlns:xsi="http://www.w3.org/2001/XMLSchema-instance"
         xsi:schemaLocation="http://maven.apache.org/POM/4.0.0 https://maven.apache.org/xsd/maven-4.0.0.xsd">
    <modelVersion>4.0.0</modelVersion>
    <parent>
        <groupId>com.example</groupId>
        <artifactId>gateway-example</artifactId>
        <version>0.0.1</version>
    </parent>

    <artifactId>webflux-resource-example</artifactId>
    <name>webflux-resource-example</name>
    <description>webflux-resource-example</description>

    <dependencies>
        <dependency>
            <groupId>org.springframework.boot</groupId>
            <artifactId>spring-boot-starter-webflux</artifactId>
        </dependency>
    </dependencies>

    <build>
        <plugins>
            <plugin>
                <groupId>org.springframework.boot</groupId>
                <artifactId>spring-boot-maven-plugin</artifactId>
                <configuration>
                    <excludes>
                        <exclude>
                            <groupId>org.projectlombok</groupId>
                            <artifactId>lombok</artifactId>
                        </exclude>
                    </excludes>
                </configuration>
            </plugin>
        </plugins>
    </build>
</project>
创建资源服务配置并且添加jwt解析器适配器
跟网关的资源服务配置差不多,如下
package com.example.config;

import org.springframework.context.annotation.Bean;
import org.springframework.context.annotation.Configuration;
import org.springframework.core.convert.converter.Converter;
import org.springframework.security.authentication.AbstractAuthenticationToken;
import org.springframework.security.config.annotation.method.configuration.EnableReactiveMethodSecurity;
import org.springframework.security.config.annotation.web.reactive.EnableWebFluxSecurity;
import org.springframework.security.config.web.server.ServerHttpSecurity;
import org.springframework.security.oauth2.jwt.Jwt;
import org.springframework.security.oauth2.server.resource.authentication.JwtAuthenticationConverter;
import org.springframework.security.oauth2.server.resource.authentication.JwtGrantedAuthoritiesConverter;
import org.springframework.security.oauth2.server.resource.authentication.ReactiveJwtAuthenticationConverterAdapter;
import org.springframework.security.web.server.SecurityWebFilterChain;
import reactor.core.publisher.Mono;

/**
 * 资源服务器配置
 *
 * @author vains
 */
@Configuration
@EnableWebFluxSecurity
@EnableReactiveMethodSecurity
public class ResourceServerConfig {

    /**
     * 配置认证相关的过滤器链
     *
     * @param http Spring Security的核心配置类
     * @return 过滤器链
     */
    @Bean
    public SecurityWebFilterChain defaultSecurityFilterChain(ServerHttpSecurity http) {
        // 禁用csrf与cors
        http.csrf(ServerHttpSecurity.CsrfSpec::disable);
        http.cors(ServerHttpSecurity.CorsSpec::disable);

        // 开启全局验证
        http.authorizeExchange((authorize) -> authorize
                //全部需要认证
                .anyExchange().authenticated()
        );

        // 设置当前服务为资源服务,解析请求头中的token
        http.oauth2ResourceServer((resourceServer) -> resourceServer
                // 使用jwt
                .jwt(jwtSpec -> jwtSpec
                        // 设置jwt解析器适配器
                        .jwtAuthenticationConverter(grantedAuthoritiesExtractor())
                )
        );
        return http.build();
    }

    /**
     * 自定义jwt解析器,设置解析出来的权限信息的前缀与在jwt中的key
     *
     * @return jwt解析器适配器 ReactiveJwtAuthenticationConverterAdapter
     */
    public Converter<Jwt, Mono<AbstractAuthenticationToken>> grantedAuthoritiesExtractor() {
        JwtGrantedAuthoritiesConverter grantedAuthoritiesConverter = new JwtGrantedAuthoritiesConverter();
        // 设置解析权限信息的前缀,设置为空是去掉前缀
        grantedAuthoritiesConverter.setAuthorityPrefix("");
        // 设置权限信息在jwt claims中的key
        grantedAuthoritiesConverter.setAuthoritiesClaimName("authorities");

        JwtAuthenticationConverter jwtAuthenticationConverter = new JwtAuthenticationConverter();
        jwtAuthenticationConverter.setJwtGrantedAuthoritiesConverter(grantedAuthoritiesConverter);
        return new ReactiveJwtAuthenticationConverterAdapter(jwtAuthenticationConverter);
    }

}
编写application.yml添加nacos配置
spring:
  cloud:
    nacos:
      serverAddr: 127.0.0.1:8848
  config:
    import:
      - nacos:webflux.yml?refresh=true
  application:
    name: webflux-resource
nacos中添加webflux.yml配置文件并添加资源服务配置
server:
  port: 7200

spring:
  security:
    oauth2:
      # 资源服务器配置
      resourceserver:
        jwt:
          # Jwt中claims的iss属性,也就是jwt的签发地址,即认证服务器的根路径
          # 资源服务器会进一步的配置,通过该地址获取公钥以解析jwt
          issuer-uri: http://192.168.119.1:8080
与webmvc的资源服务的配置是一样的,注意端口不能与其它服务端口冲突
模块结构
在三个模块中添加测试类,一式三份
webmvc测试接口
package com.example.controller;

import org.springframework.security.access.prepost.PreAuthorize;
import org.springframework.web.bind.annotation.GetMapping;
import org.springframework.web.bind.annotation.RestController;

/**
 * 测试接口
 *
 * @author vains
 */
@RestController
public class TestController {

    @GetMapping("/test01")
    @PreAuthorize("hasAnyAuthority('message.write')")
    public String test01() {
        return "test01";
    }

    @GetMapping("/test02")
    @PreAuthorize("hasAnyAuthority('test02')")
    public String test02() {
        return "test02";
    }

    @GetMapping("/app")
    @PreAuthorize("hasAnyAuthority('app')")
    public String app() {
        return "app";
    }

}
webflux测试接口
package com.example.controller;

import org.springframework.security.access.prepost.PreAuthorize;
import org.springframework.web.bind.annotation.GetMapping;
import org.springframework.web.bind.annotation.RestController;
import reactor.core.publisher.Mono;

/**
 * 测试接口
 *
 * @author vains
 */
@RestController
public class TestController {

    @GetMapping("/test01")
    @PreAuthorize("hasAnyAuthority('message.write')")
    public Mono<String> test01() {
        return Mono.just("test01");
    }

    @GetMapping("/test02")
    @PreAuthorize("hasAnyAuthority('test02')")
    public Mono<String> test02() {
        return Mono.just("test02");
    }

    @GetMapping("/app")
    @PreAuthorize("hasAnyAuthority('app')")
    public Mono<String> app() {
        return Mono.just("app");
    }

}
测试
前置条件
- 启动认证服务
- 启动nacos
- nacos中都有相关配置
启动项目
依次启动三个服务,顺序无所谓
在postman中直接访问网关接口或代理的服务接口
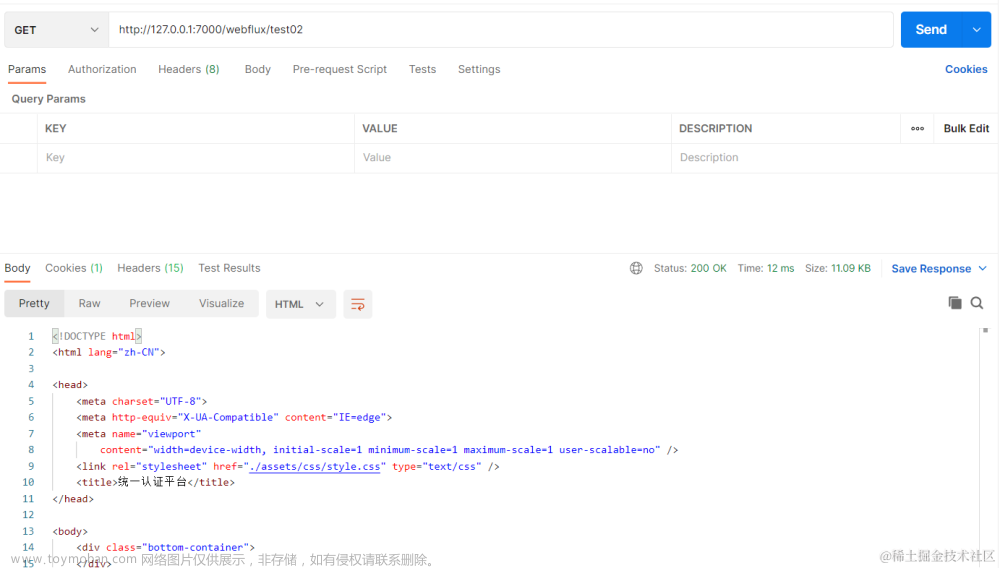
被重定向至登录了,携带X-Requested-With请求头访问,代表当前是xhr请求

响应401,框架有区分是浏览器请求还是xhr请求,对于浏览器请求会重定向到页面,对于xhr请求默认会响应401状态码,可自己实现异常处理,这里错误信息在请求头中是因为没有重写异常处理,网关资源服务配置代码中有注释。
在浏览器中访问网关接口或代理的服务接口
访问
浏览器打开地址:http://127.0.0.1:7000/resource/app
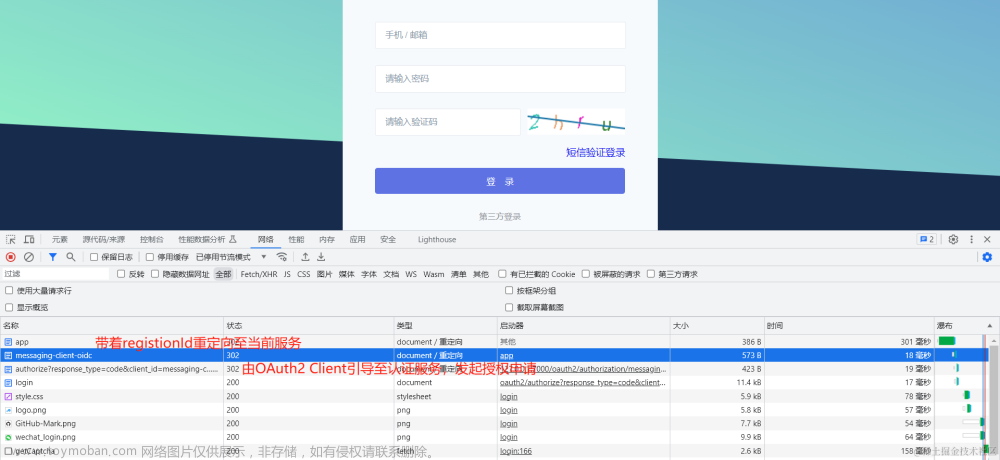
请求到达网关后检测到未登录会引导用户进行OAuth2认证流程
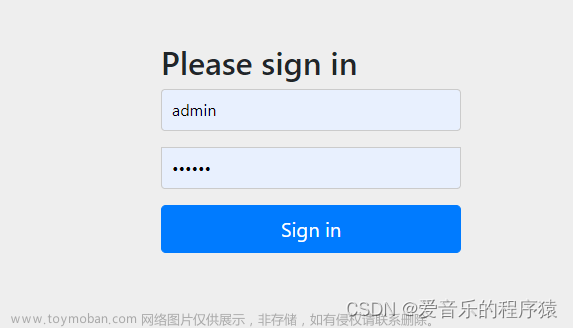
登录后提交
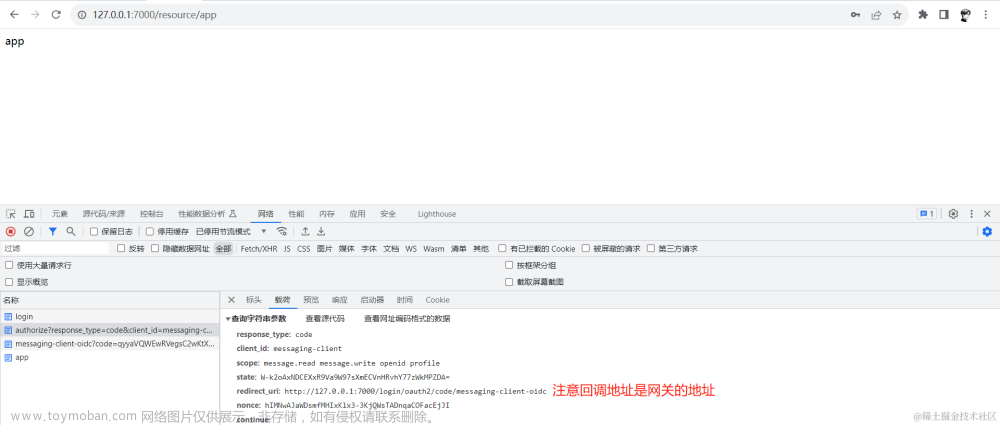
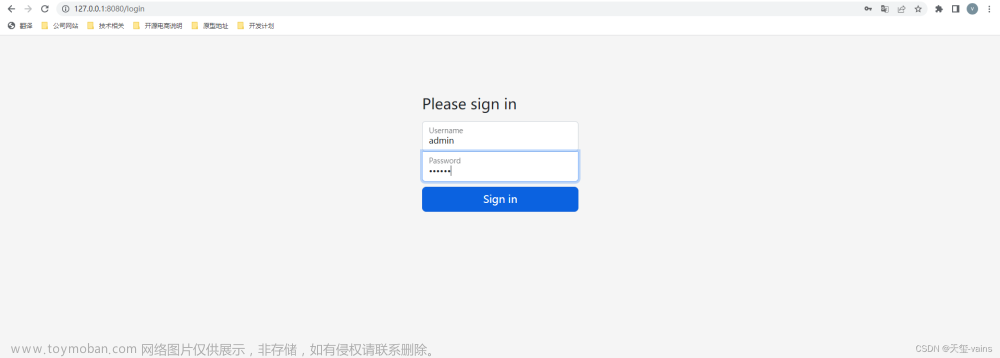
登录提交后认证服务重定向授权申请接口,校验通过后会生成code并携带code重定向至回调地址,注意,这里的回调地址是网关的服务地址,由网关中的OAuth2 Client处理,如图
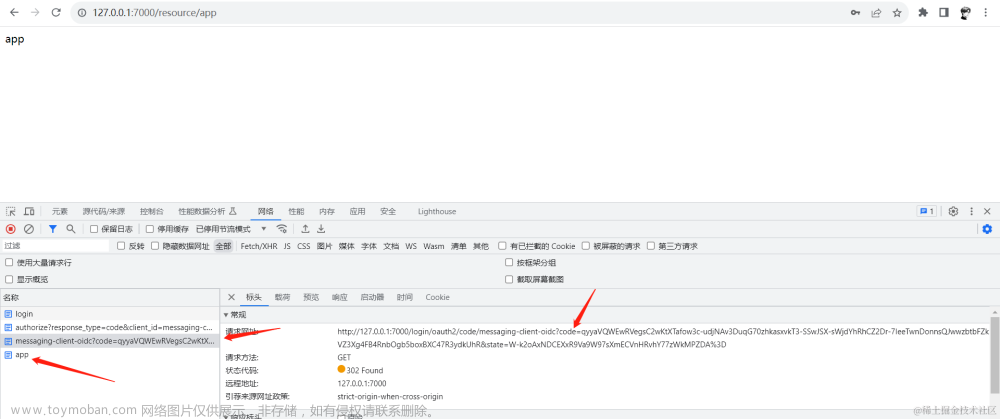
网关会根据code换取token,获取token后根据token获取用户信息,并调用网关客户端配置中自定义的userAuthoritiesMapper解析权限信息。
访问权限不足的接口
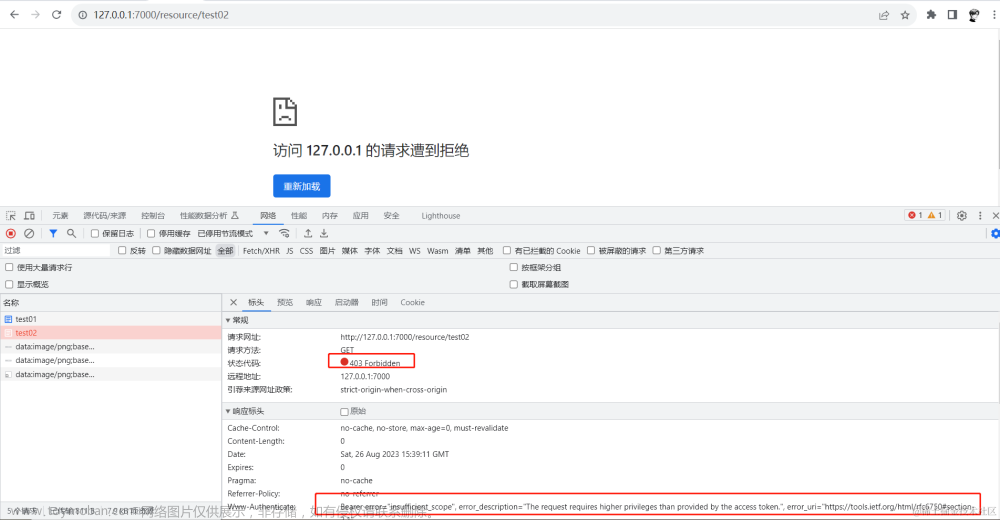
响应403,并将错误信息放入响应头中
使用token访问网关
过期token

响应401并在响应头中提示token已过期
错误token
响应401并在响应头中提示token无法解析
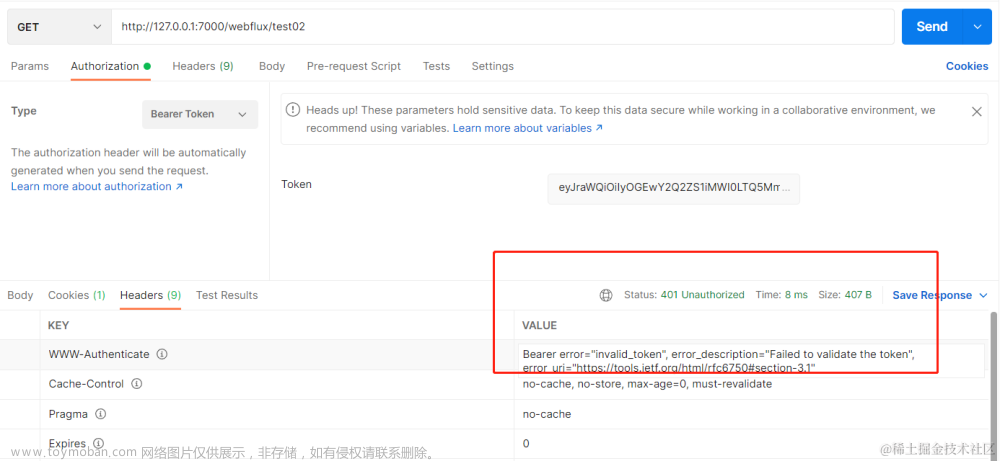
权限不足token

响应403并提示权限不足
正常请求
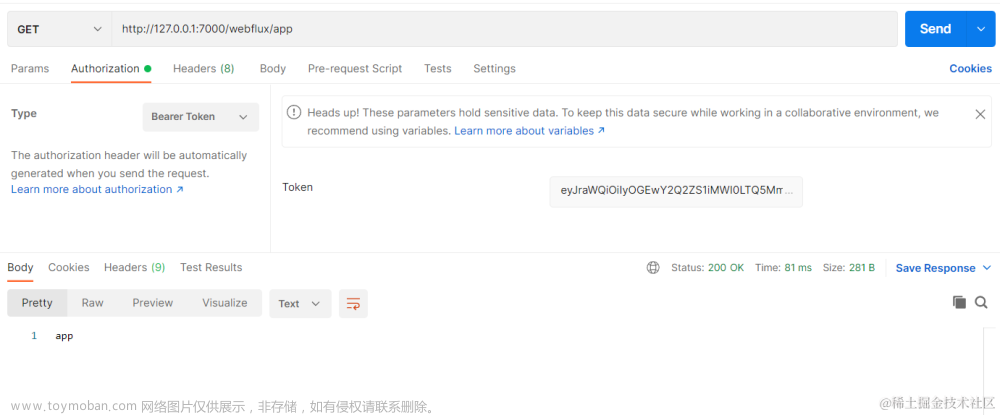
响应200并正确响应接口信息
写在最后
本文带大家简单实现了Spring Cloud Gateway对接认证服务,Gateway中添加客户端主要是为了如果代理服务有静态资源(html、css、image)时可以直接发起OAuth2授权流程,在浏览器登录后直接访问,同时也是开启令牌中继的必要依赖;引入Resource Server依赖是当需要对网关的接口鉴权时可以直接使用,如果网关只负责转发应该是可以去掉资源服务相关依赖和配置的,由各个被代理的微服务对自己的接口进行鉴权。这些东西在之前基本都是讲过的内容,所以本文很多地方都是一笔带过的,如果某些地方不清楚可以针对性的翻翻之前的文章,也可以在评论区中提出。
如果有什么问题或者需要补充的请在评论区指出,谢谢。文章来源:https://www.toymoban.com/news/detail-683272.html
附录
Gitee仓库地址
Gateway令牌中继文档
OAuth2登录后用户权限解析文档
webflux开启方法鉴权EnableReactiveMethodSecurity注解说明文档
webflux的Jwt解析器适配器说明文档
webflux对接OAuth2 Client文档
webflux对接OAuth2 Resource Server文档
文章来源地址https://www.toymoban.com/news/detail-683272.html
到了这里,关于Spring Authorization Server入门 (十六) Spring Cloud Gateway对接认证服务的文章就介绍完了。如果您还想了解更多内容,请在右上角搜索TOY模板网以前的文章或继续浏览下面的相关文章,希望大家以后多多支持TOY模板网!